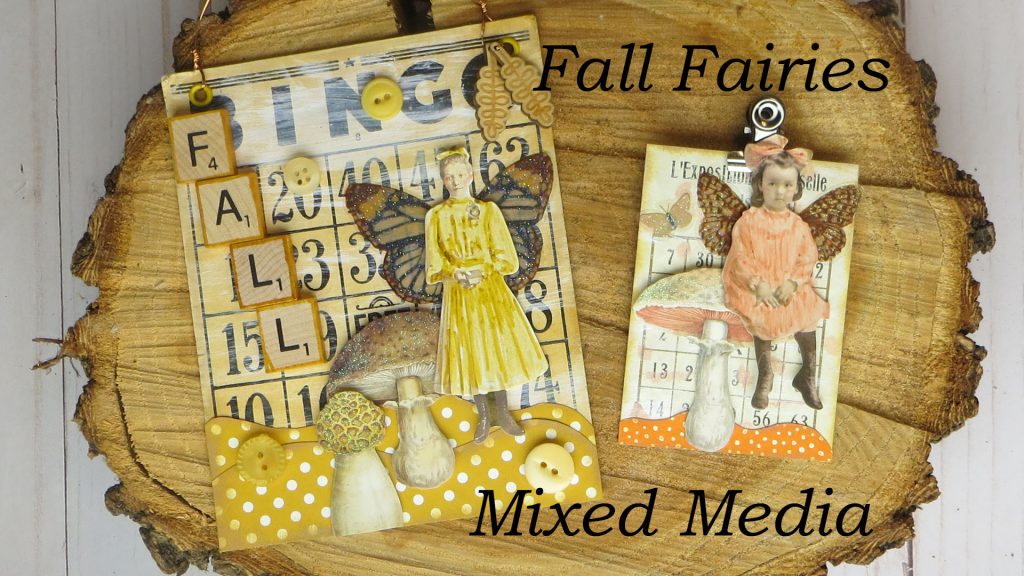
I made two mixed media collage art wall hangings for Fall on vintage Bingo cards. One is a large wall hanging the other is an Artist Trading Card (ATC) ornament. I used products from Tim Holtz and supplies from the craft store to make them.
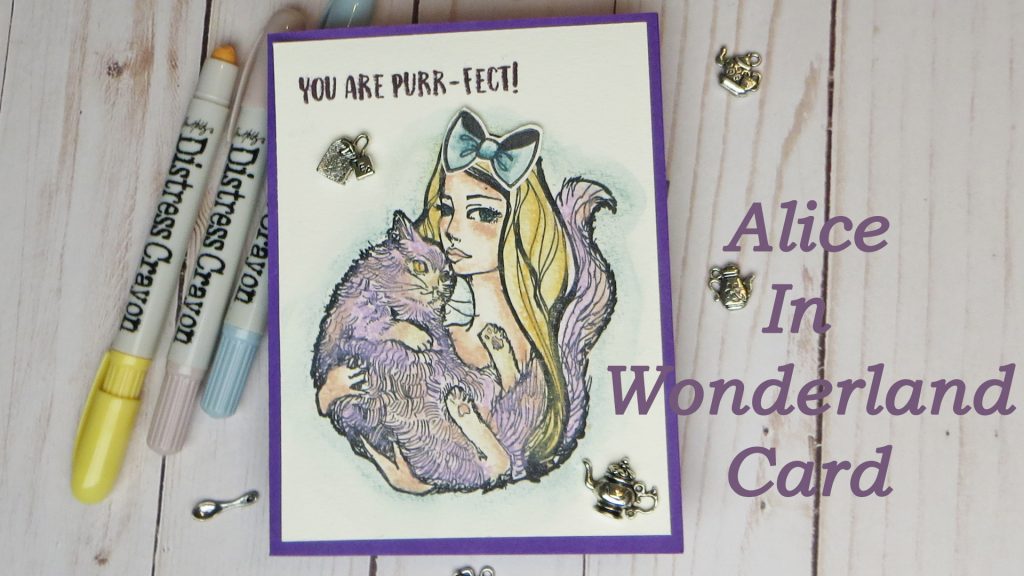
I used one of the new Whimsical and Wild stamp sets from Jane Davenport to create a fun Alice in Wonderland themed card. I used Distress Crayons from Tim Holtz to watercolor the image and added a few tea charms to finish it off.
Click here to visit my Youtube channel to watch my tutorial.
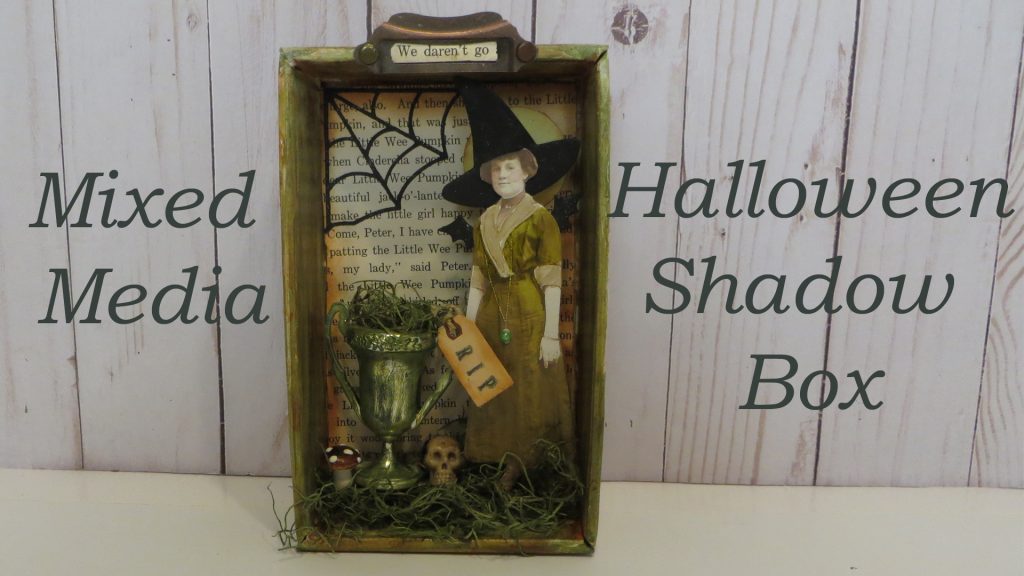
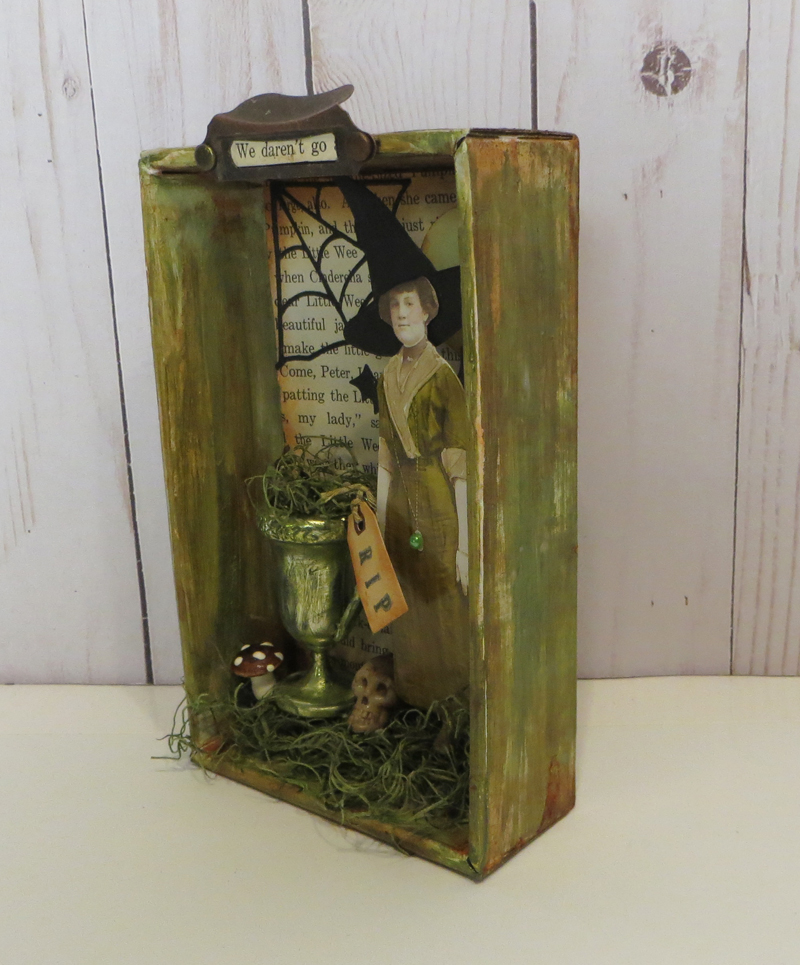
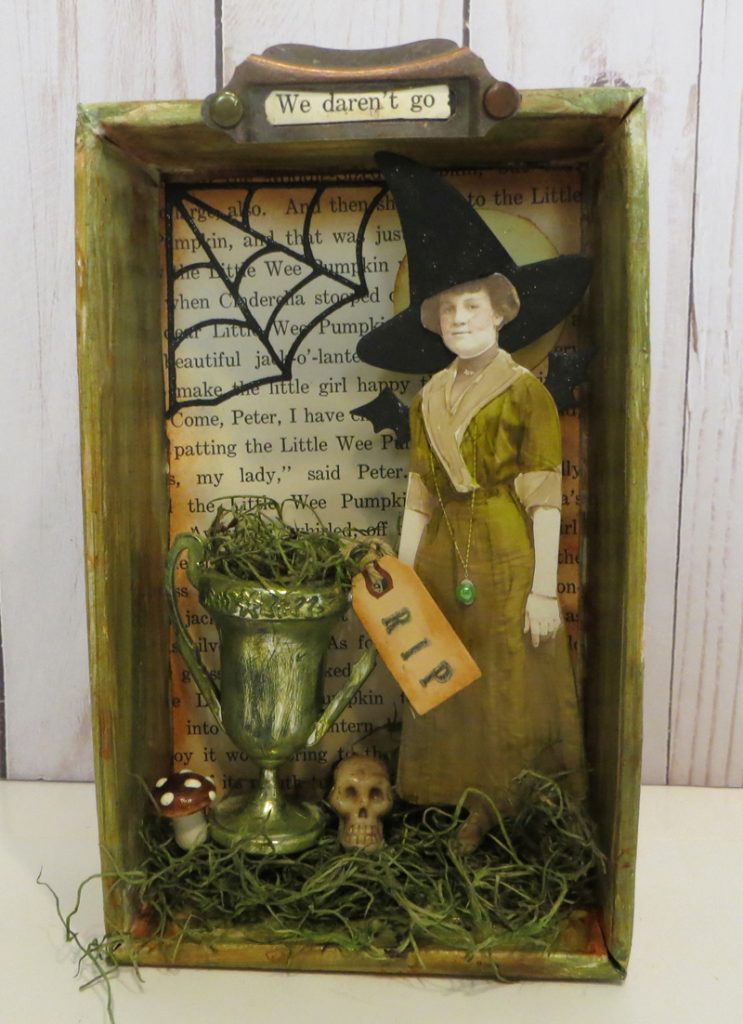
I created this spooky Halloween Shadow Box using products from Tim Holtz and items from the craft store. It would be the perfect center piece for a haunted Halloween table. I filmed a video on how to make one, you can click here to watch it in HD on my Youtube channel or check it out down below.
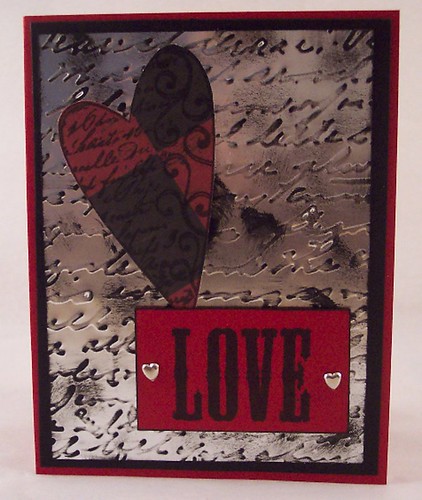
One of the few remaining magazine devoted completely to rubber stamping is The Stamper’s Sampler. I recently posted a review of their latest Winter issue along with a card inspired by Tim Holtz, who is the featured artist. Click here to read my review over on Craft Gossip, including how to make my Tim inspired Valentine card, this is a great masculine style, perfect to give to the man in your life.
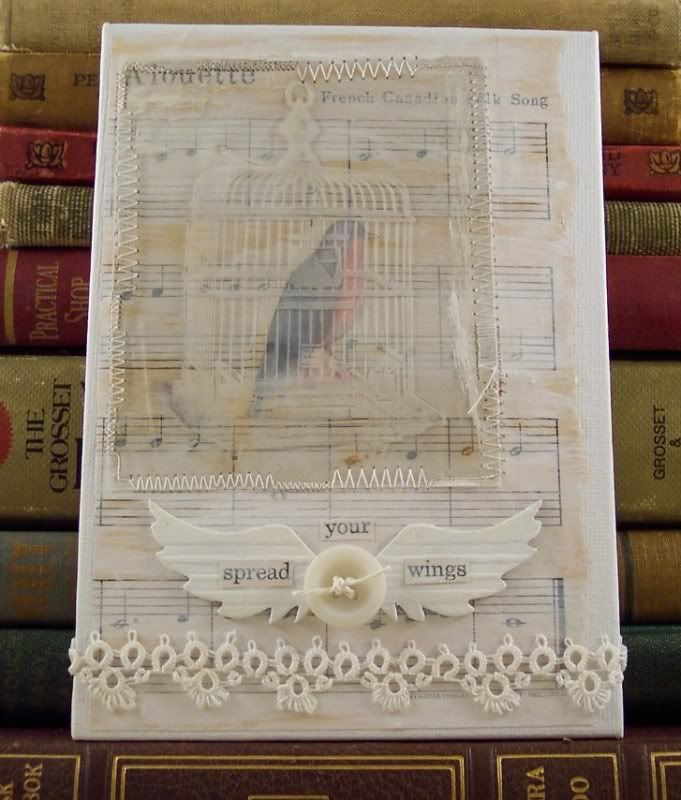
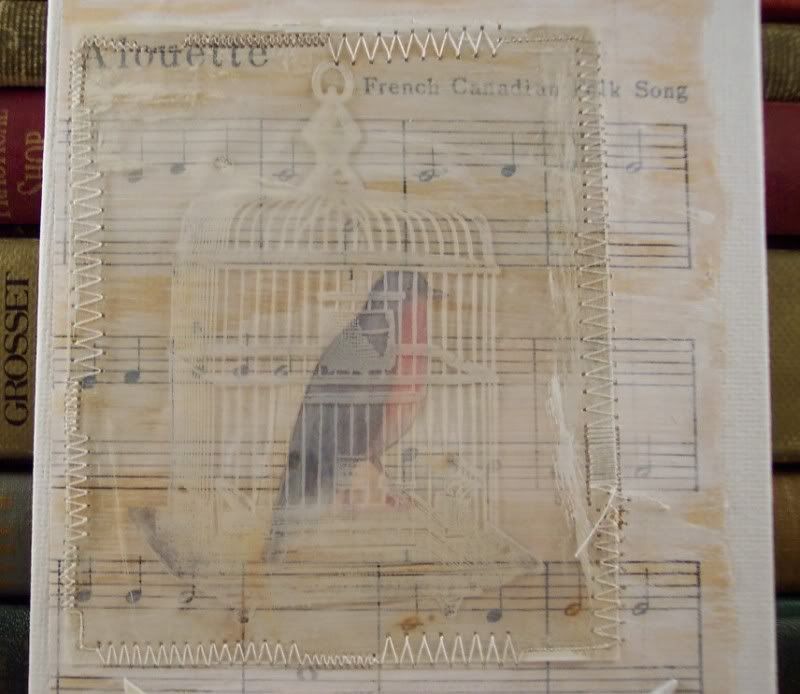
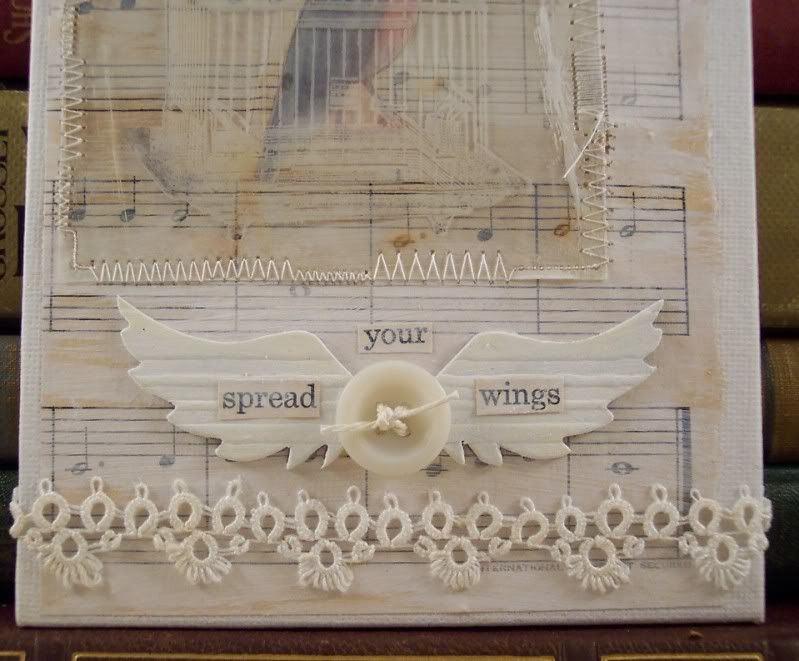
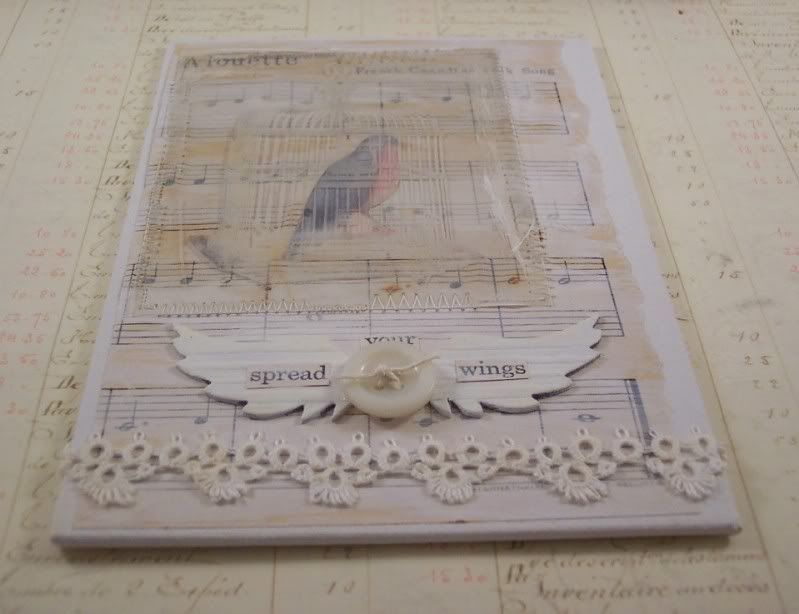
I’ve really been inspired lately by all the collages I’ve seen that are various shades of white, I love the “shabby” look of it. So I thought I’d give it a try. I white washed most of the items with gesso, sometimes adding water sometimes just straight from the bottle. First I white washed some vintage music paper and an image of a blue bird, then stamped the bird cage on transparency using white, I adhered the bird to the paper and then using my sewing machine I stitched the transparency onto the paper using different stitches. I then white washed a pair of Tim Holtz’ grungeboard wings (if you don’t know grungeboard is sort of a flexible type of chipboard, it’s very cool to work with), tied some string through a vintage button, added them to the board along with the words “spread your wings” and then added some vintage white lace across the bottom. It’s a very different look for me but I like it alot:)
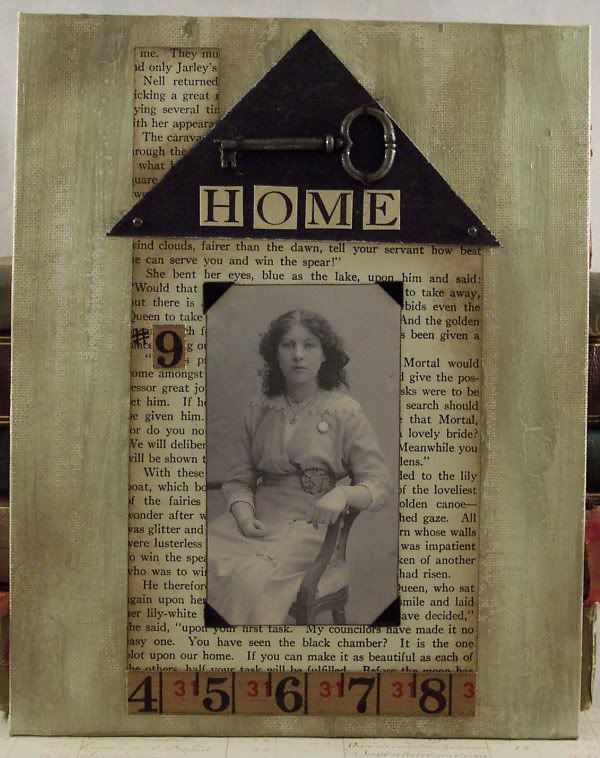
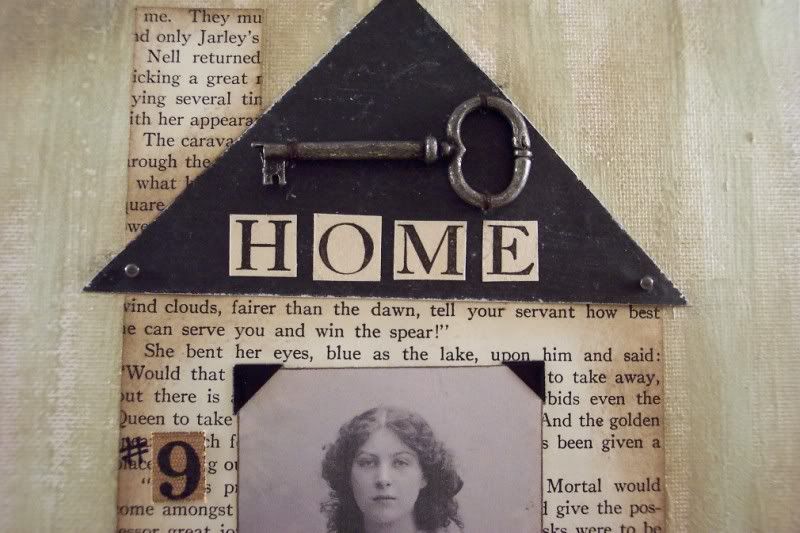
I love the shape of a house as a base for a collage, it’s warm and well, so homey:) I just finished this collage on canvas board, the background on the board is layers of Tim Holtz’ crackled paint with several colors of ink rubbed over top of the paint. I cut the shape of the house and chimney from vintage book paper, I inked the edges to make it more aged looking and added a strip from a vintage tape measure as the base of the house. I cut the roof out of black cardstock that has a white core, I then sanded it to bring out some of the white and make it look more shabby. I made a copy of a lovely Victorian photograph I have and mounted it in the middle of the house using black photo corners. I had a small piece left from timming the tape measure and added it like a house number. Before I attached the roof I added some letters cut from an vintage book, small brads and sewed on a large metal key. I think a collage like this would be the perfect house warming gift for someone moving into a new home.
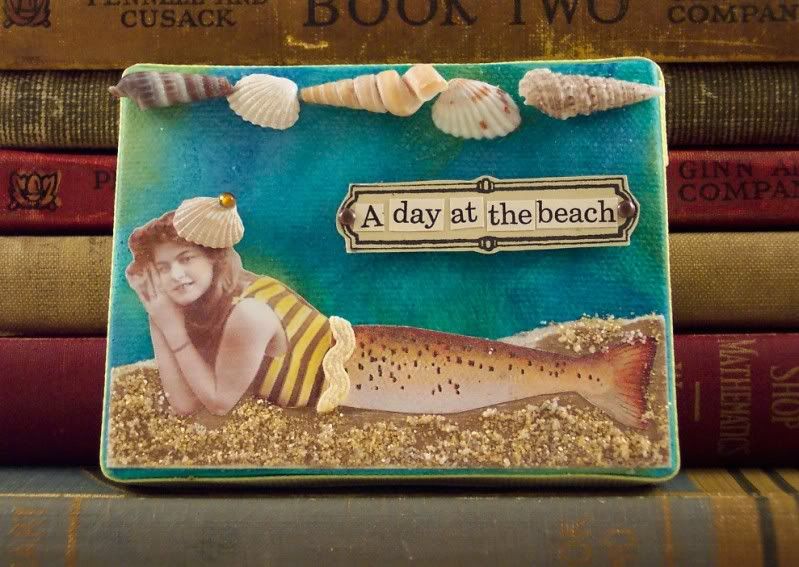
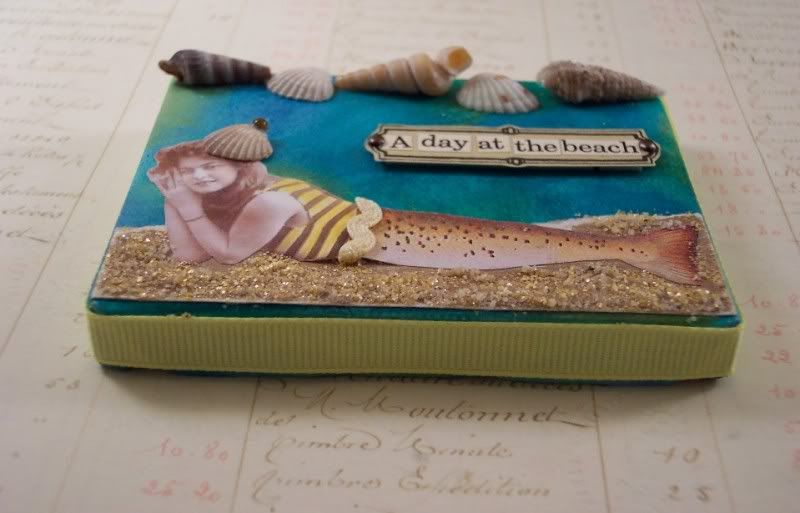
My mom recently came back from Florida (were she was born) and brought back some really neat tiny sea shells and ask if I wanted some for my artwork and of course I did:) I used them in this fun little collage of a mermaid laying on the beach. I love mermaids almost as much as I do fairies:) I took a vintage image of a lady in a swimsuit and cut off her legs and added the tail of a fish from a vintage nature book, they didn’t really “match” so I wrapped some rickrack around her waist and it helped to tie the two halves of her together (sounds like Dr. Frankenstein or something, hehe) I inked up the small canvas (which is 3 3/4″ 2 3/4″) with various shades of blues, greens and yellows and wrapped yellow grosgrain ribbon around the edges to hide the staples. I tore and sanded cardstock for the beach, attached the mermaid and then added real sand mixed with Tim Holtz’s glitter glue for a very realistic looking beach. I then added those great shells from my mom and stamped and cut out a plaque and added the words “A day at the beach” cut from a vintage book. Makes me wish I was at the beach!
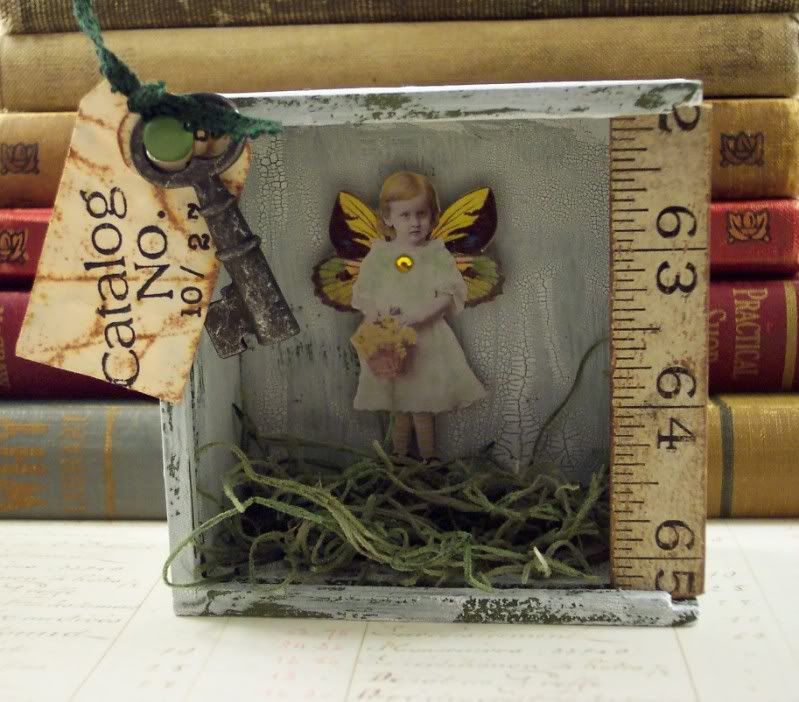
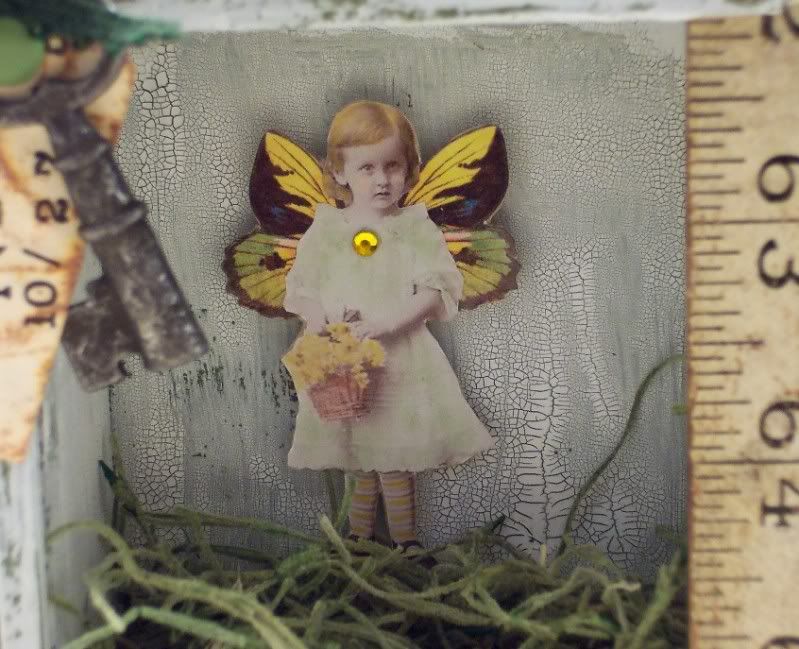
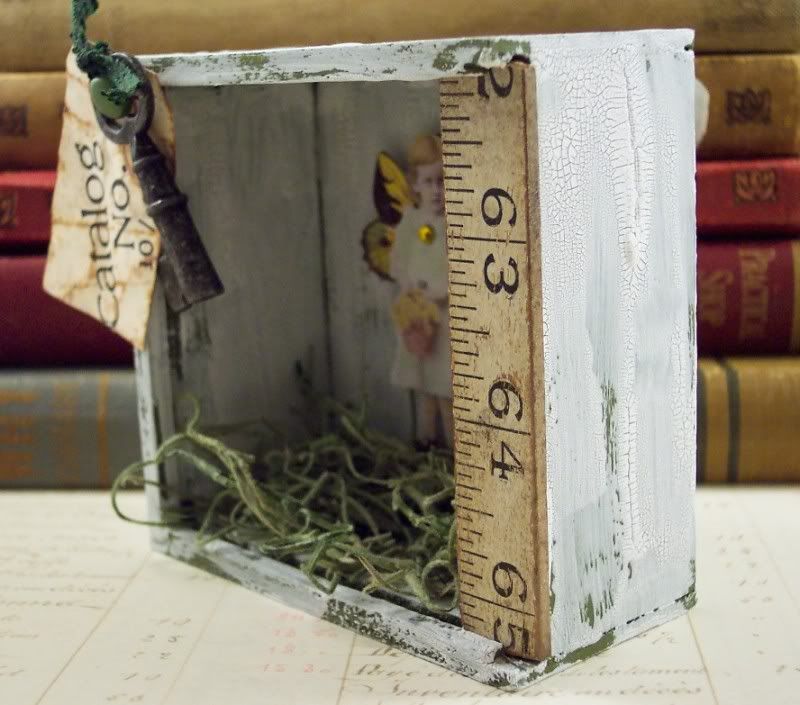
I caught another fairy:) I took a vintage image of a little girl holding a basket of flowers, colored her and added a rhinestone to her dress and gave her some yellow and green wings. I placed her inside a wooden box I painted green and then crackled with white crackle paint. ( Tim Holtz’ Picket Fence white), I think the white makes it look very shabby chic:) I also added some fake grass at her feet, an aged tag, vintage looking key and a piece of vintage wooden yard stick.
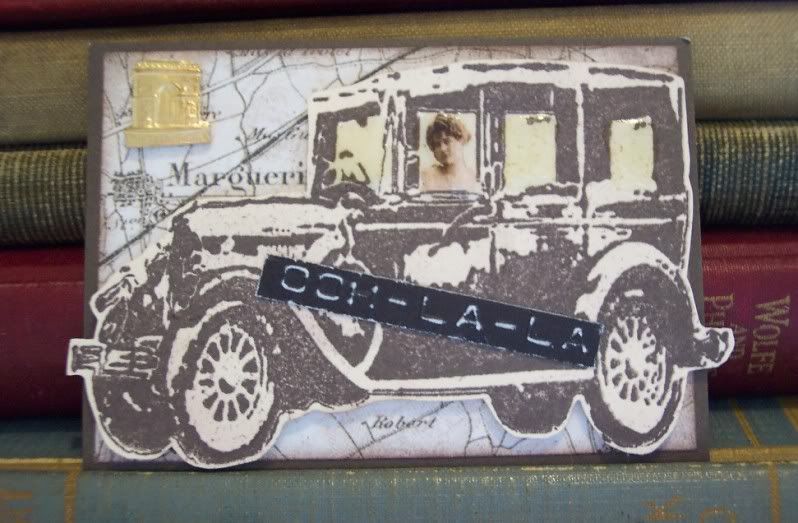
I made this ATC for a Travel theme challenge and I guess I still had Paris on my mind:)
The background is cardstock with a scrapbook paper that looks like an old French map. The car is a Tim Holtz stamp, I added an image of a woman driving and then added liquid glass (a clear dimensional adhesive) to all the windows to make them more realistic. I also added a brass charm of the Arch D’ Triumph and the words “Ooh-la-la” embossed in my label maker.
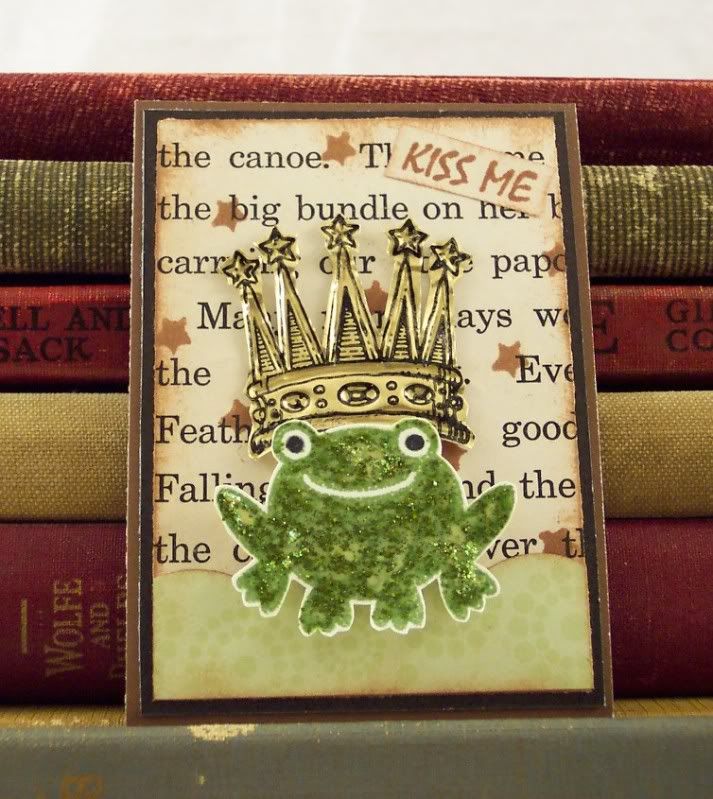
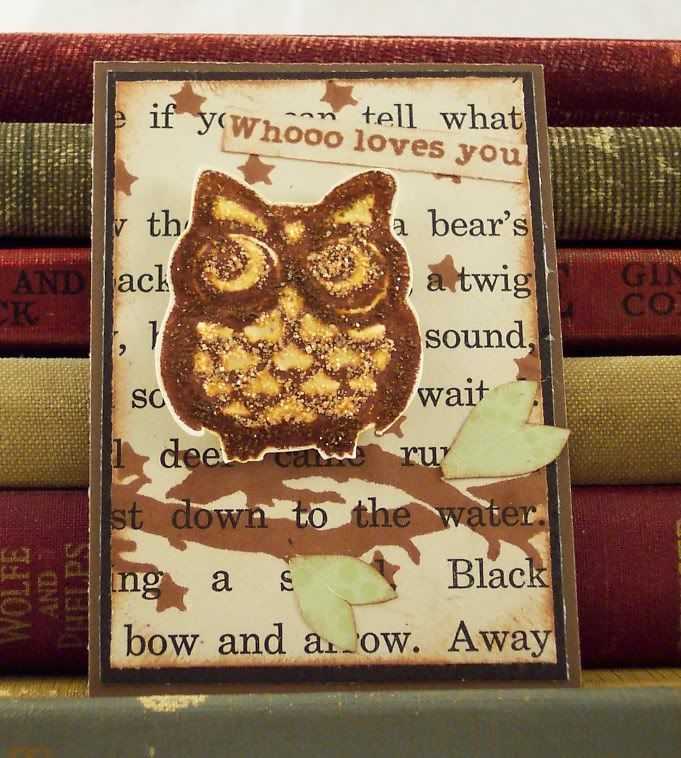
I recently got a super cute stamp set of forest animals and made some Artist Trading cards with them. I layered brown and black cardstock and then added a layer cut from a vintage children’s story book and stamped tiny stars on the book paper. Then I stamped the images, cut them out and mounted them with foam tape and then added Tim Holts’ distress Stickles glitter glue to each image. It adds a nice bit of color and chunky glitter but it’s more of an aged glitter look like German glass glitter than more traditional “sparkly” glitters, it’s really fun to use. Just a note I find it takes quite awhile to dry though so keep that in mind when using it.
“Sing” The first one is a deer in the forest, I stamped a tree trunk onto a scalloped I die cut and added a cute bluebird in the tree.
“Frog Prince” This next one is an adorable frog, I added a big gold crown to him. I stamped the crown on a thin metal gold sheet and then embossed it with a stylus tool then cut it out.
“Whoo?” The last one is an owl, he’s sitting on a stamped branch with cut out paper leaves.