Posts Tagged ‘ATC’
Tuesday, April 21st, 2009
I’ve made a few more Alice in Wonderland themed Art Cards (cards measuring 3 1/2″ x 2 1/2″).
This first one is an image of Alice peering over the edge of the mushroom to talk to the Caterpillar while he smokes his hookah. The image is colored with colored pencils and I added “grass” at the base of the mushroom and ran a thin strip of cardstock through my label maker for the words “Who Are You” floating above them.

For this next card I put the image of Alice looking at her reflection in the looking glass directly on a piece of glass and colored on the backside with markers. I also rimmed the edge of the glass with a gold pen.
Tags:ACEO, alice, art card, ATC, caterpillar, collage, glass, looking glass, mushroom, wonderland
Posted in ATC | No Comments »
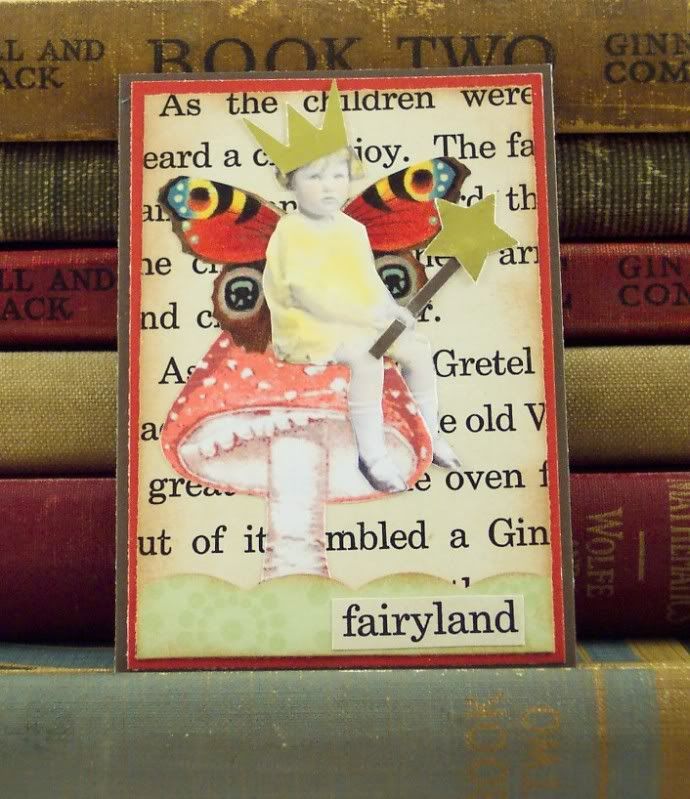
Thursday, April 16th, 2009
Here’s a cute little art card I made last week. It’s a sweet little fairy sitting on a mushroom wearing a paper crown I cut from gold metallic paper and holding a fairy wand with gold star punched from the same paper. I added a scalloped green paper hill and the words “fairyland” cut from a vintage children’s book. It’s layered on vintage book paper and cardstocks. Since the image of the girl was black and white I added some color to her with chalks.
Here’s some info on chalks. Chalks give you a soft pastel look (they are also called artist pastels) and they work nicely with vintage images, it looks alot like the tinting they did on their photos back then. I use q-tips to apply chalks, it gives you alot of control and it’s easy to color into small areas. Chalks can be blended and colors mixed but it’s usually very subtle. Also with the correct eraser chalks can usually be removed from most surfaces in case of mistakes, so that’s a big plus for them. I like chalks that come in little square “cakes” but “stick” chalks work pretty much the same way. Sometimes you might feel the need to “set” your chalks, a clear spray will work nicely, don’t use a sealant that needs to be brushed on, it will usually smear the chalk. Another fun thing to do with chalks is use a clear blender pen or colorless marker with them, simply rub the tip of the marker over the surface of your chalk and then color with it, it gives a much more vibrant tone to the chalk color and it’s easier to shade. Just rub the tip of the marker on a paper towel until it runs clear to clean it. Test your paper first though as these types of markers can sometimes leave an oily film behind.
Colored pencils can be used to color your vintage images too, they will give you a darker look and more shading but can sometimes look heavy handed on vintage images.
Tags:art card, ATC, atrist trading card, chalks, fairies, fairy, fairyland, mushroom
Posted in ATC | No Comments »
Wednesday, April 1st, 2009
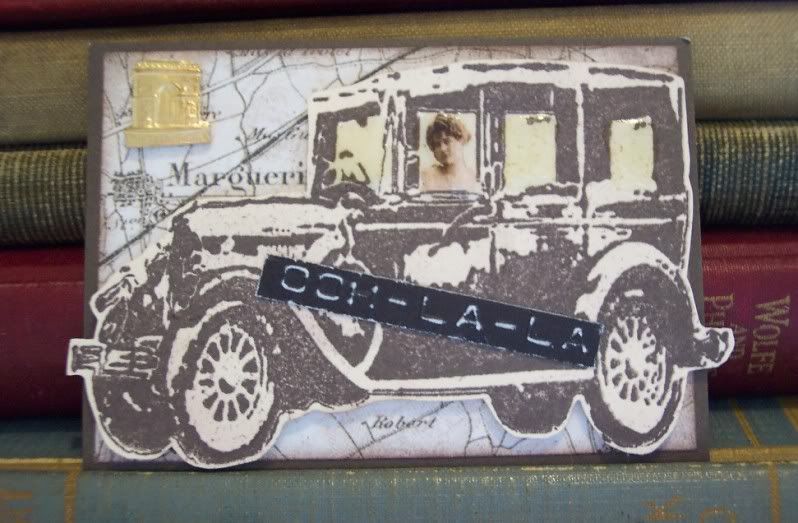
I made this ATC for a Travel theme challenge and I guess I still had Paris on my mind:)
The background is cardstock with a scrapbook paper that looks like an old French map. The car is a Tim Holtz stamp, I added an image of a woman driving and then added liquid glass (a clear dimensional adhesive) to all the windows to make them more realistic. I also added a brass charm of the Arch D’ Triumph and the words “Ooh-la-la” embossed in my label maker.
Tags:art card, artist trading card, ATC, car, France, Paris, tim holtz
Posted in ATC | 1 Comment »
Friday, March 27th, 2009
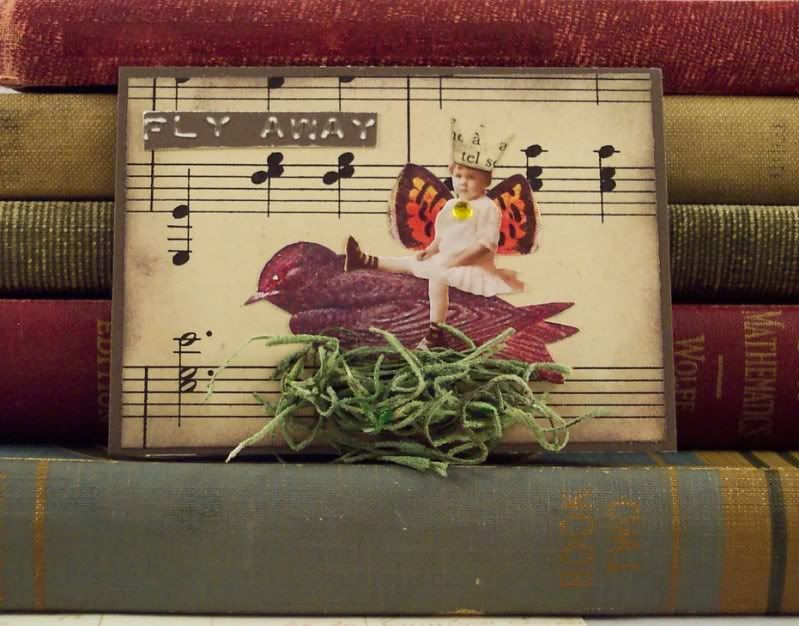
I’m totally obsessed with bird images lately and of course I’m always going to try to work a fairy in somewhere 🙂 so I decided to put the two together in my latest set of ATC’s. The base is dark brown cardstock and vintage music sheet and I added a vintage image of a bird with a little fairy princess wearing a crown sitting on the birds back. I wanted the bird sitting on a nest but couldn’t find a good image of a bird nest and don’t have a stamp the right size but I did have some fake grass so I took a small amount and squished it into a sort of nest shaped, I think it really added alot of dimension and realism to the cards. I also wanted some text so I took very thin strips of white core cardstock and ran them through my label maker and then sanded the letters so they’d show up better.
“Fly Away”
“Take Flight”

“Soar High”
Tags:ACEO, artist trading card, ATC, bird, fairies, fairy, flight, fly, music sheet, nest
Posted in ATC | 4 Comments »
Friday, March 20th, 2009
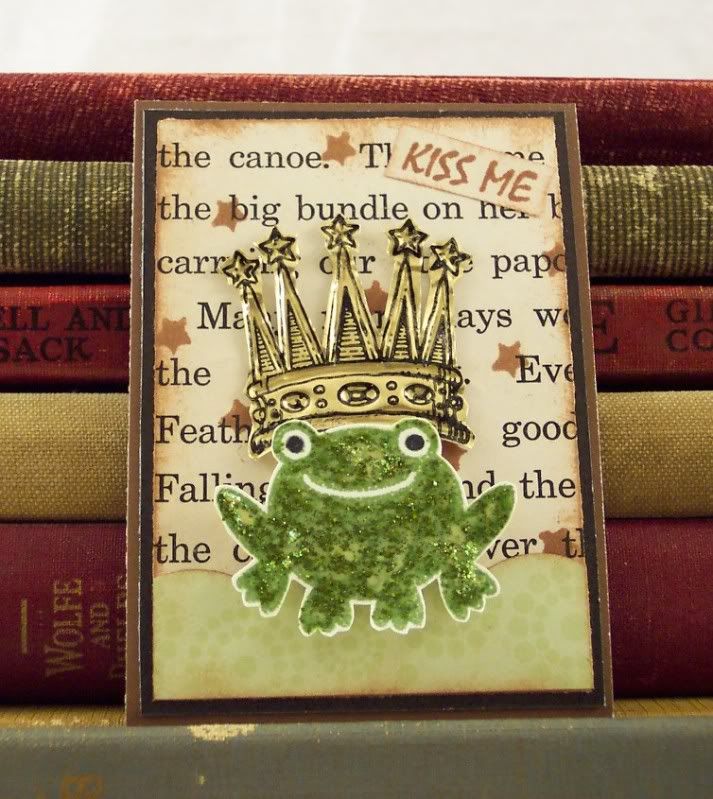
I recently got a super cute stamp set of forest animals and made some Artist Trading cards with them. I layered brown and black cardstock and then added a layer cut from a vintage children’s story book and stamped tiny stars on the book paper. Then I stamped the images, cut them out and mounted them with foam tape and then added Tim Holts’ distress Stickles glitter glue to each image. It adds a nice bit of color and chunky glitter but it’s more of an aged glitter look like German glass glitter than more traditional “sparkly” glitters, it’s really fun to use. Just a note I find it takes quite awhile to dry though so keep that in mind when using it.
“Sing” The first one is a deer in the forest, I stamped a tree trunk onto a scalloped I die cut and added a cute bluebird in the tree.

“Frog Prince” This next one is an adorable frog, I added a big gold crown to him. I stamped the crown on a thin metal gold sheet and then embossed it with a stylus tool then cut it out.
“Whoo?” The last one is an owl, he’s sitting on a stamped branch with cut out paper leaves.
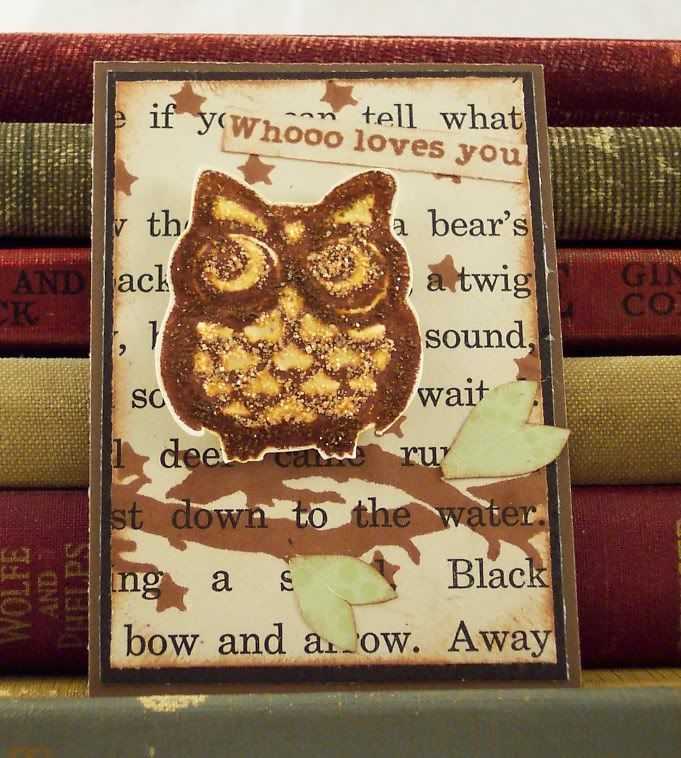
Tags:ACEO, animals, artist trading card, ATC, deer, frog, glitter, owl, prince, stamped, stickles, tim holtz, woodland
Posted in ATC | 1 Comment »
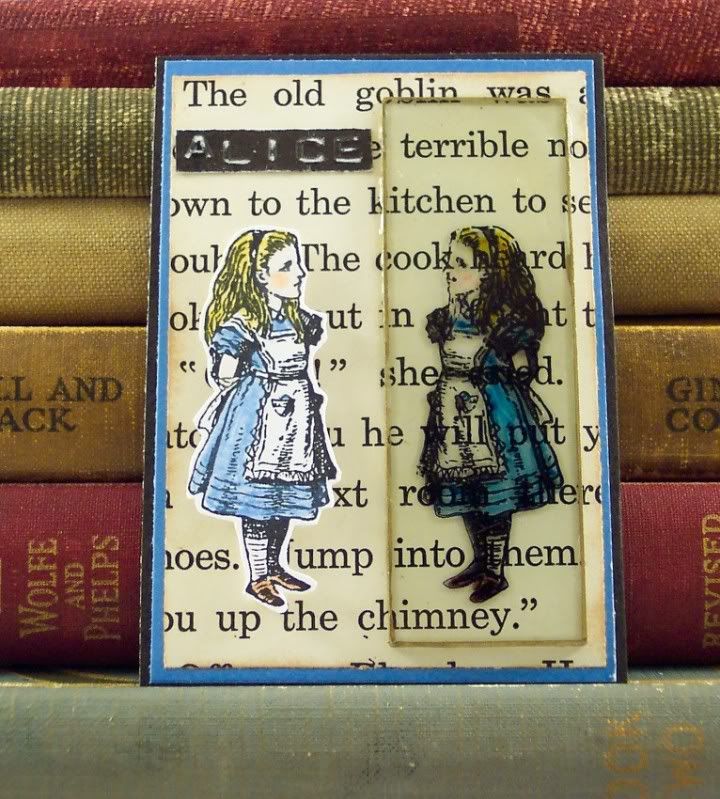
Friday, March 6th, 2009
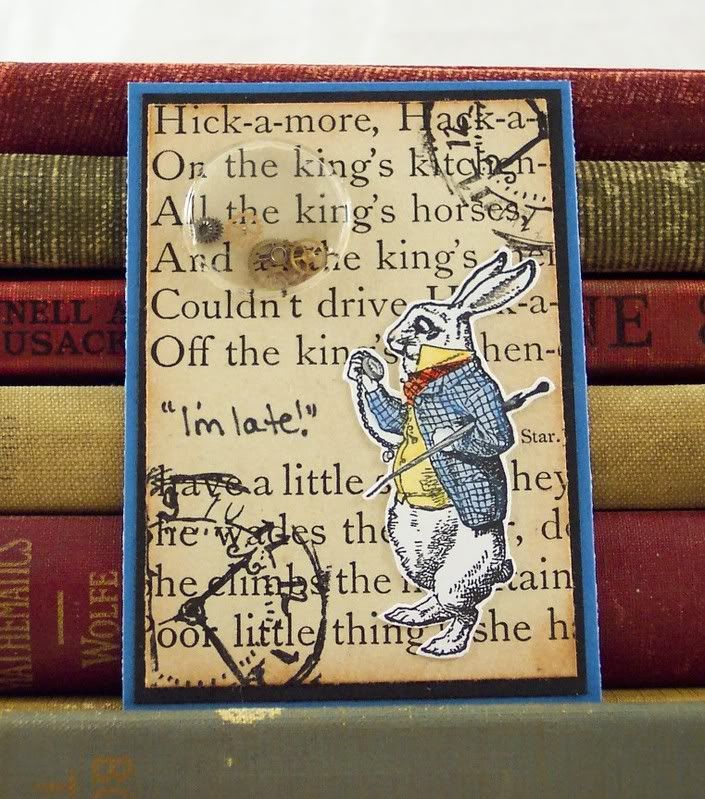
I love Alice in Wonderland, the books, the movie, the artwork, it’s one of my favorite inspirations. Awhile ago I got some stamps of Tenniel’s illustrations from Alice in Wonderland from a company that is sadly no longer in business so I’m glad I got them when I did. Anyway I got them out the other day and made some cool Artist Trading Cards (ATC’s) with them.
All of them are 3 1/2″ x 2 1/2″ on a base of cardstock and vintage children’s book pages. The images were stamped and then colored using Prisma colored pencils and a blending solution called Gamsol (you can get it from Inky Antics: http://www.inkyantics.com/acc1.htm) you use an artists blending stump to blend and soften the color pencils, I love the look and control it gives.
The first one is the White Rabbit, holding his pocket watch. I stamped some clock images on the background page and added a real watch crystal with some real watch parts inside, they move when you shake the card 🙂
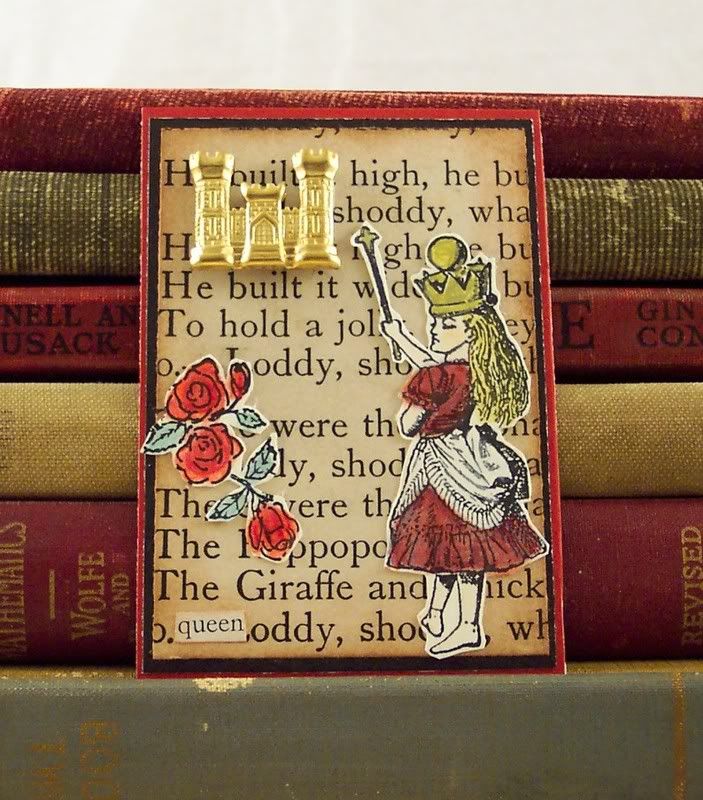
The next is Alice dressed as the Queen, wearing a gold crown and holding a golden scepter, I colored them with a gold gel pen so that they are a shiny gold. I also added some red roses (already painted red by the cards) and also a gold charm of a castle.
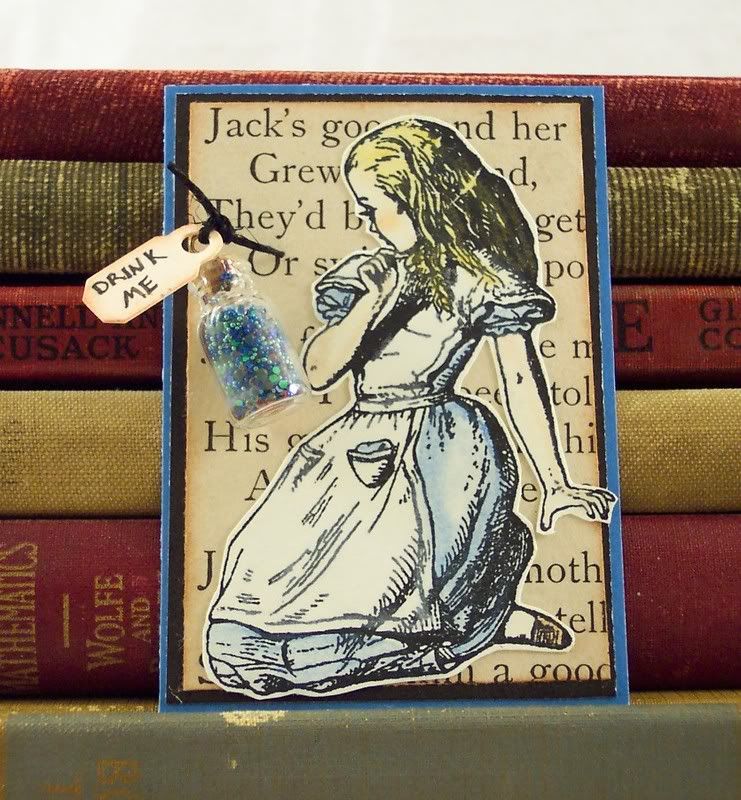
This last one is my favorite, I love the part of the book where Alice drinks from the bottles and grows large and then tiny. Here is Alice after she’s large looking at the bottle, it’s an actual tiny glass bottle with a cork stopper filled with tiny blue beads and glitter and I tied around a tiny tag that says “Drink Me”.
Tags:ACEO, alice, art, artist trading cards, ATC, collage, queen, white rabbit, wonderland
Posted in ATC | 4 Comments »
Wednesday, March 4th, 2009
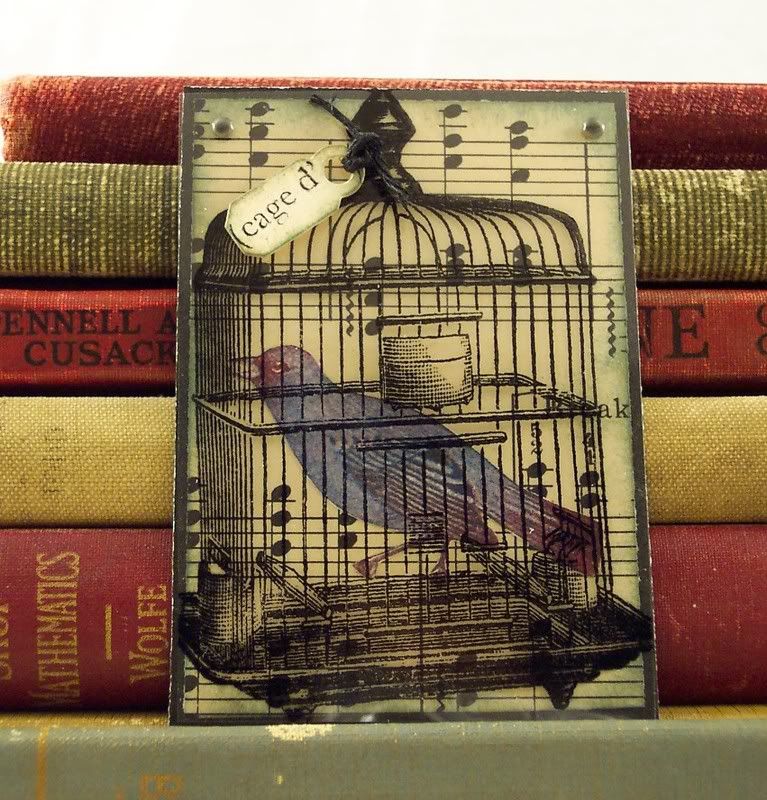
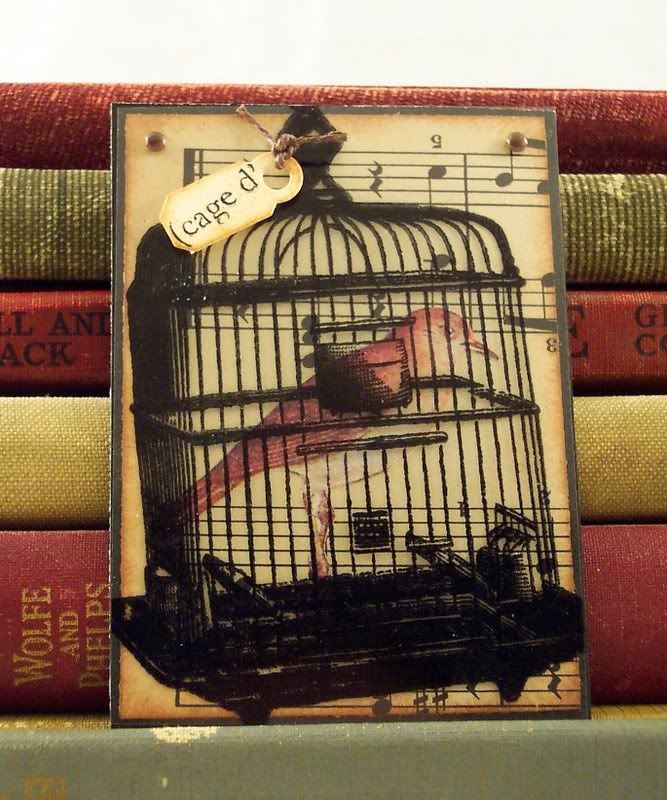
I recently got a really cool stamp set featuring bird cages from Catherine Moore: http://www.characterconstructions.com/ , I love her art work and her stamps are great!
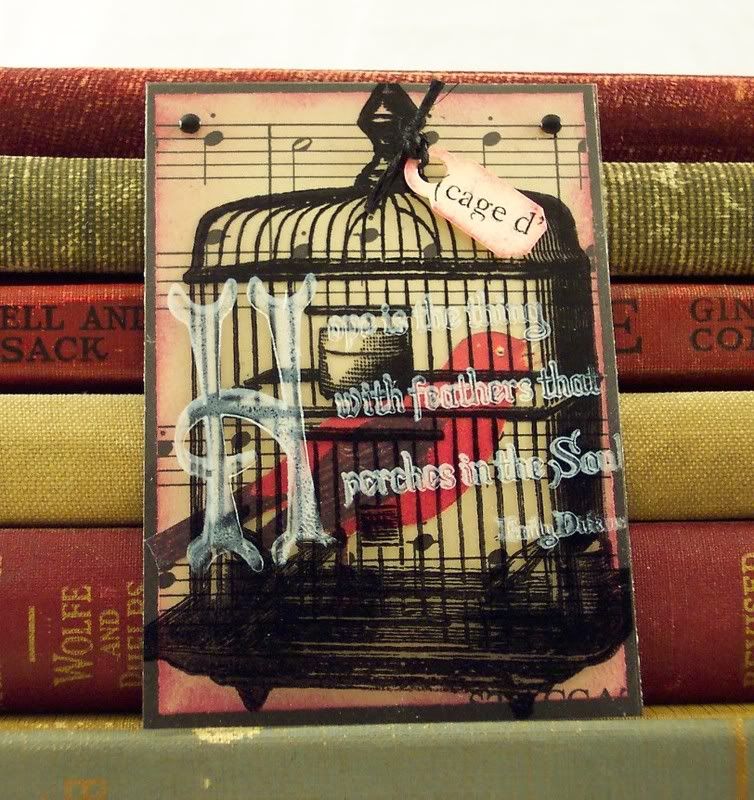
I made a few ATC’s (Artist Trading Cards) with them. I started by making a base ( 3 1/2″ x 2 1/2″) for my card from black cardstock and vintage music sheets, I then added a vintage bird image. Then using black Staz-On ink I stamped the bird cage on a transparency sheet and attached it to the card with tiny brads. I then stamped part of one of the words on a tiny tag, it says ” (cage ‘d” and tied some hemp string around the tag and added it to the card with foam tape. All three cards were done the same way except the one with the quote, I turned the transparency over and stamped in white Staz-On ink a quote from Emily Dickinson that says “Hope is the thing with feathers that perches in the soul”. I love old bird images and think these cards came out really neat.
If you don’t know alot about ATC’s here’s a helpful link:
http://www.artist-trading-cards.ch/
Tags:ACEO, art, ATC, bird, birds, cage, caged, collage, emily dickinson, mixed media, small
Posted in ATC | 1 Comment »
Sunday, February 15th, 2009
I love working with beeswax but it’s a little time consuming, a little messy and a little unpredictable but it’s fun so it’s worth it:)
Here’s a little info on using beeswax. I use an old small crock pot for my beeswax, keep in mind you can’t ever use it for food (or anything else for that matter :)) ever again. Melting Pots work too but you’d have to clean it out I guess if you used it for anything else. I just leave the wax inside when I’m done, it cools and dries and I put it away and just plug it back in next time I’m ready to use it. Now here’s the time consuming part, it takes hours for the wax to melt again and I’m not a patient crafter so I hate waiting! I use a wooden spoon to help stir the wax (metal can get hot) and tweezers to dip with. I lay my items on wax paper to cool. So all you do is make your item (in this case I made a collage of a fairy in a jar and cut them out) pick it up with the tweezers and VERY quickly dip it in and out of the wax, letting any excess drip back into the pot. If you leave it too long the wax will be too thick to see your art work underneath. If that does happen you can try to melt some of it and blow it out of the way with your heat tool. You can also dip a paint brush in the melted beeswax and brush it over larger objects like canvases. Then just lay it flat to dry and cool, don’t touch it while it’s wet, it drys pretty quickly.
So, I got out my beeswax pot the other day and made some really fun ATC’s (artist trading cards). The jars are dipped, giving them the look of cloudy old glass, it’s hard to capture in a photo but they are very cool in person.
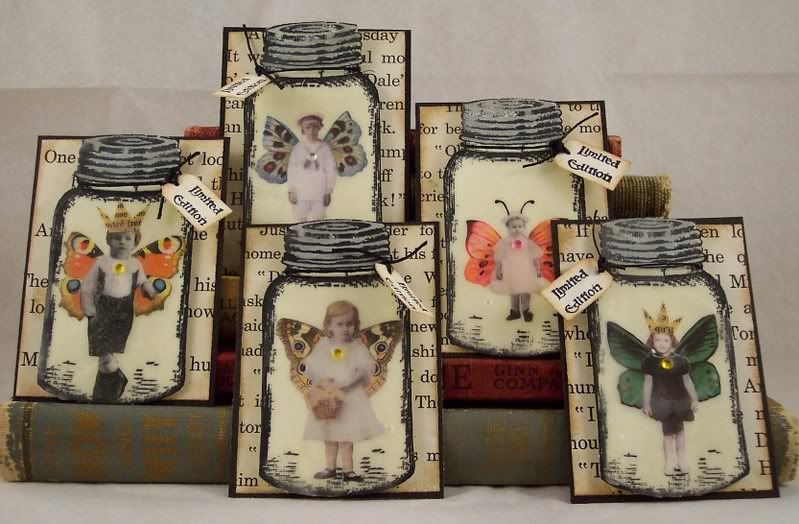
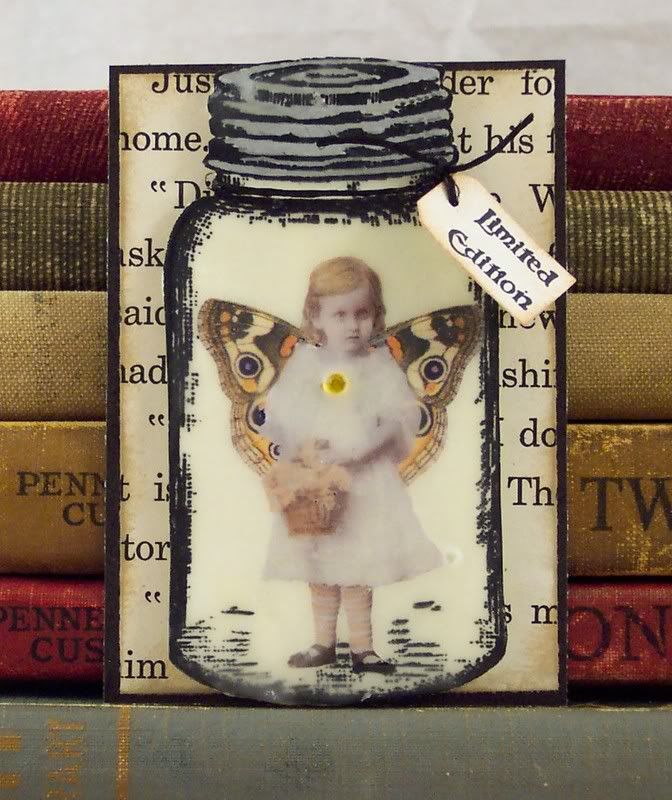
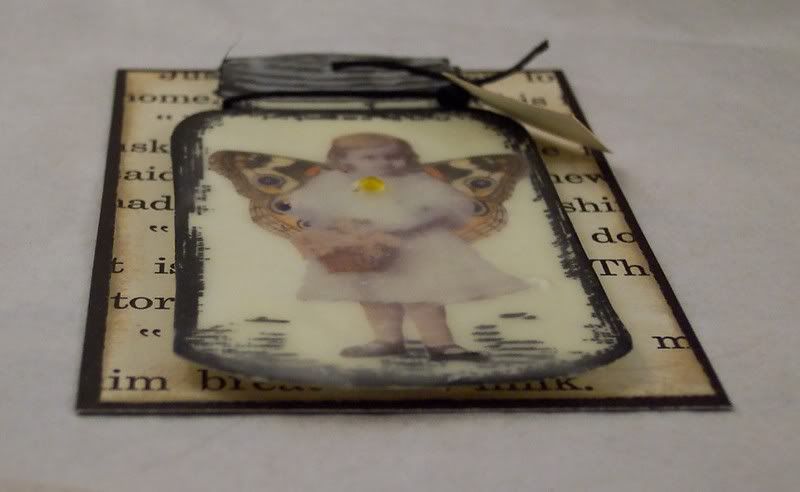
These will be listed for sale in my Etsy shop over the next few days.
Tags:ACEO, art, artist trading cards, ATC, beeswax, captured, collage, fairies, fairy, jar, mixed media
Posted in ATC | 6 Comments »
