The Queen of Fairies!
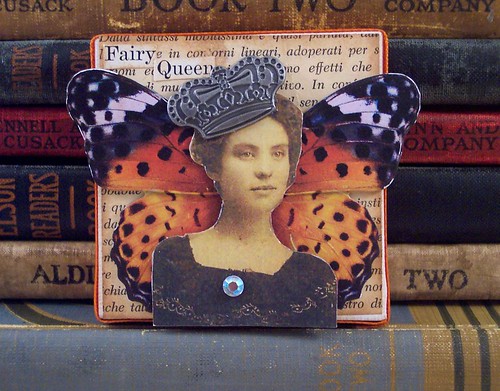
collage on small canvas.

The Queen of Fairies!
collage on small canvas.
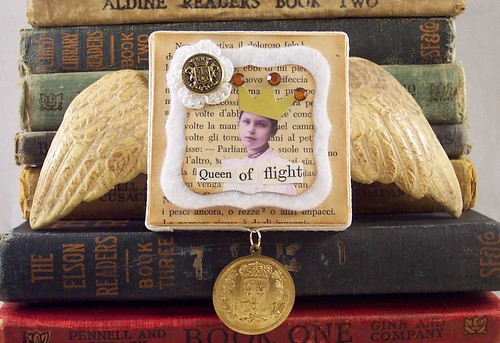
A while ago a friend cleaned out her craft closet and gave me lots of cool stuff to play with. One of the things she gave me was a bag of angel wings she’d removed from some old ornaments. It took awhile to figure out what I wanted to do with them but I got the crazy idea to mount a small canvas on the front and I came up with…The Queen of Flight. There’s layers of vintage paper, felt, rhinestones, book text, a vintage button and a charm dangling from the bottom too. I think she’s ready to take flight!
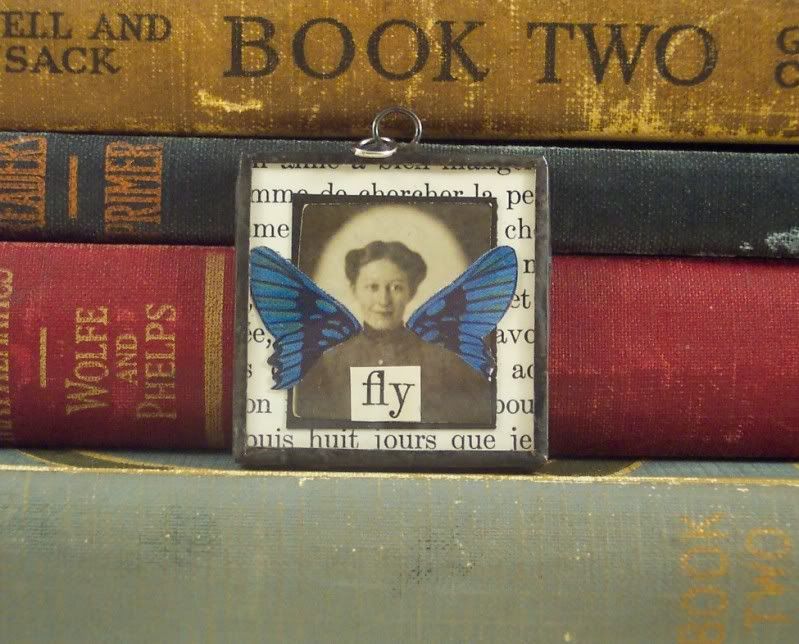
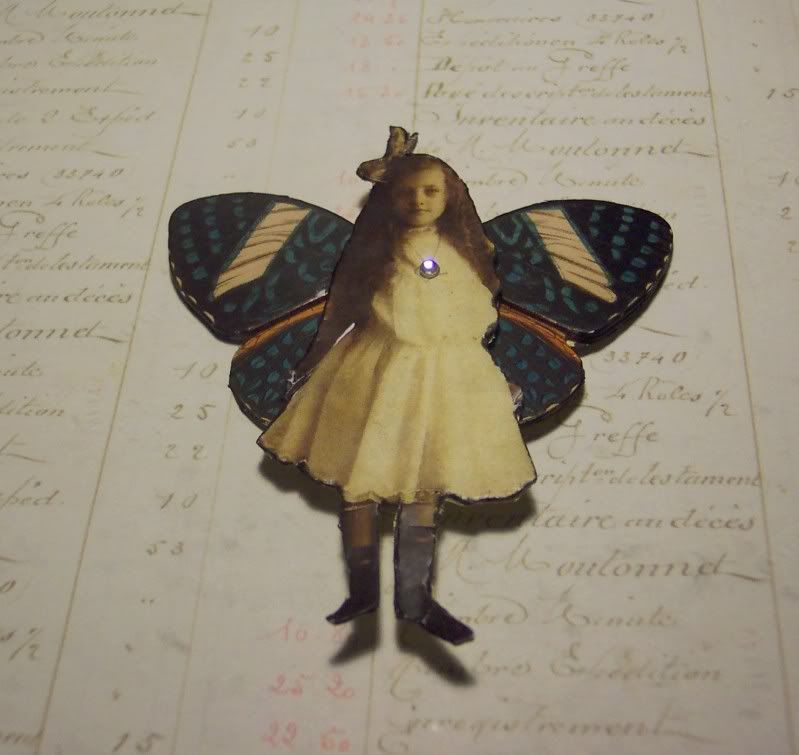
A while ago I had found some lovely small vintage photos at an antique store. I think they must have been a type of model shot, some had the same girls in different outfits. They are the perfect size for jewelry. I turned this pretty girl into a fairy by adding blue wings to her. I didn’t want to cut the actual photo so I cut the edge of the wings to match her shoulders and applied them onto the photo. I also added the word “fly” from a vintage book and mounted her on vintage French book paper. The tiny collage is sandwiched between glass and soldered around the edges. Because the photo is black and white I added black patina to the solder to pull everything together.
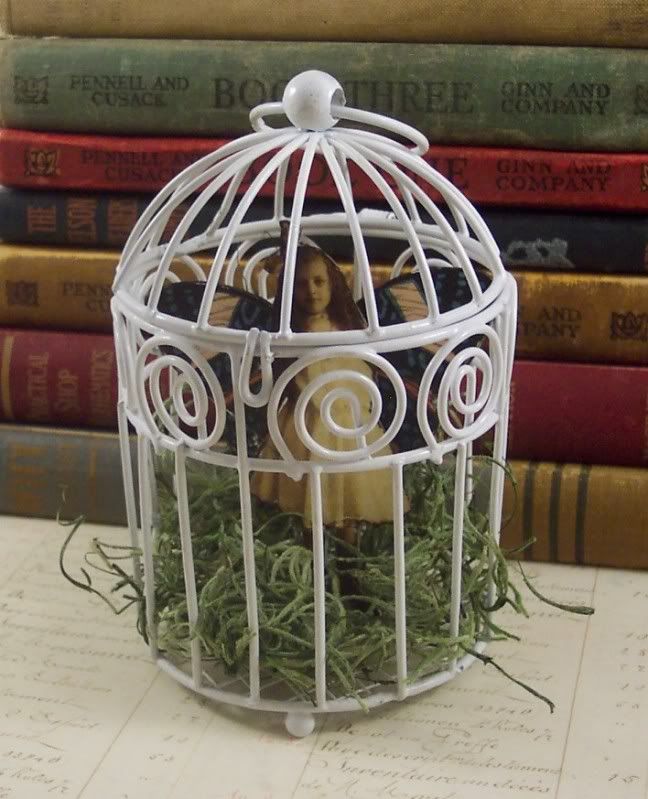
I found these cool little metal bird cages at the craft store and thought they were fun. I turned this one into a captured fairy cage. I used a photocopy of a cute vintage girl and adhered her to chipboard and cut her out, then added some chipboard wings behind her and a rhinestone. I put faux grass in the bottom of the cage and set her inside. Pretty simple but pretty cute too 🙂
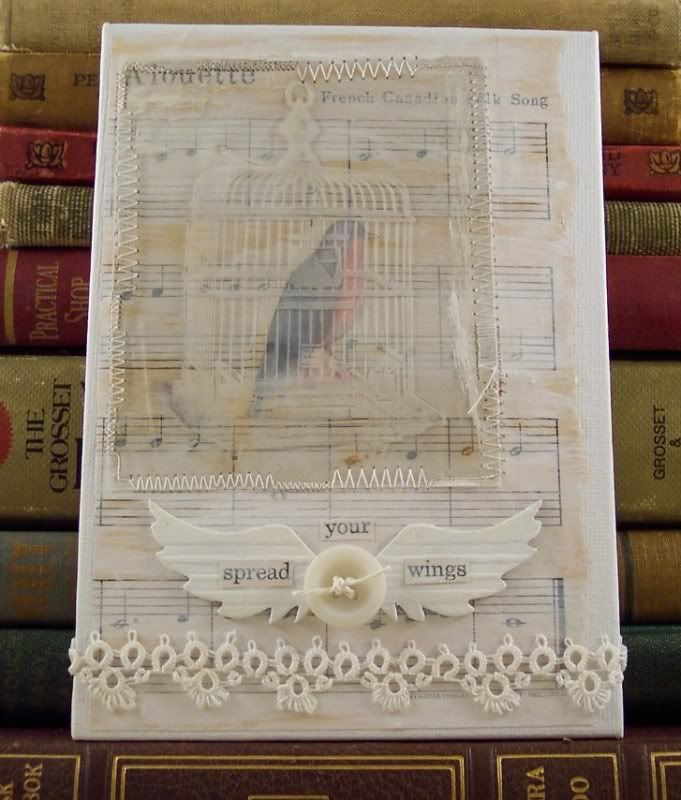
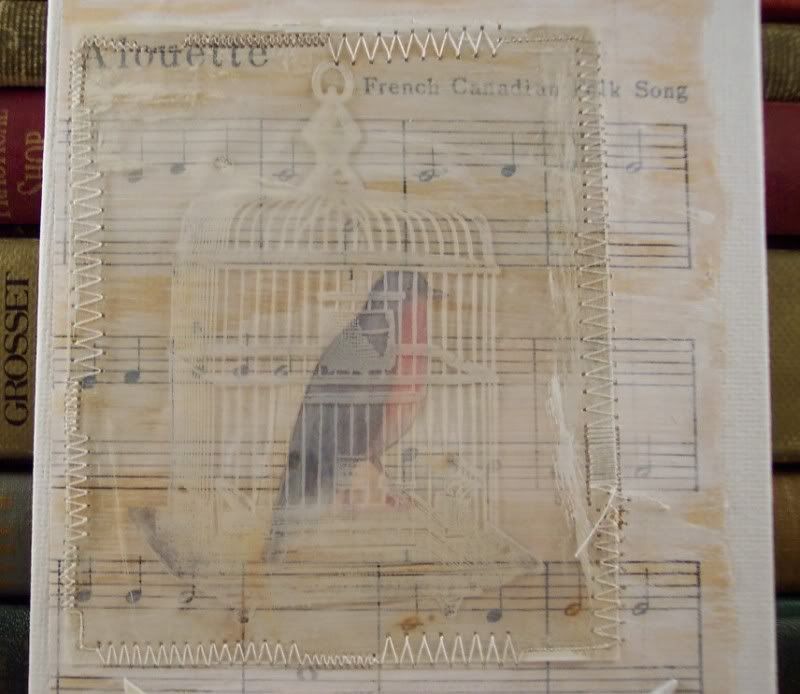
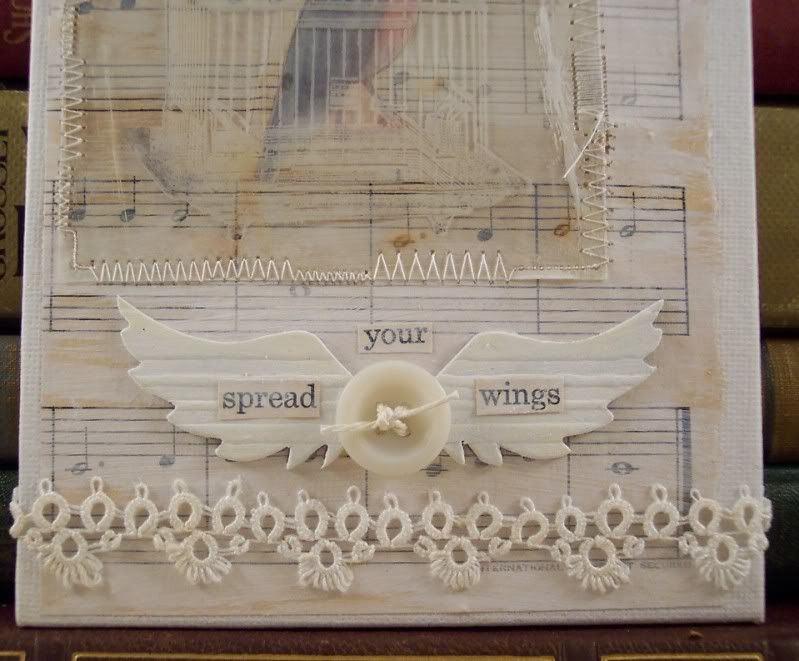
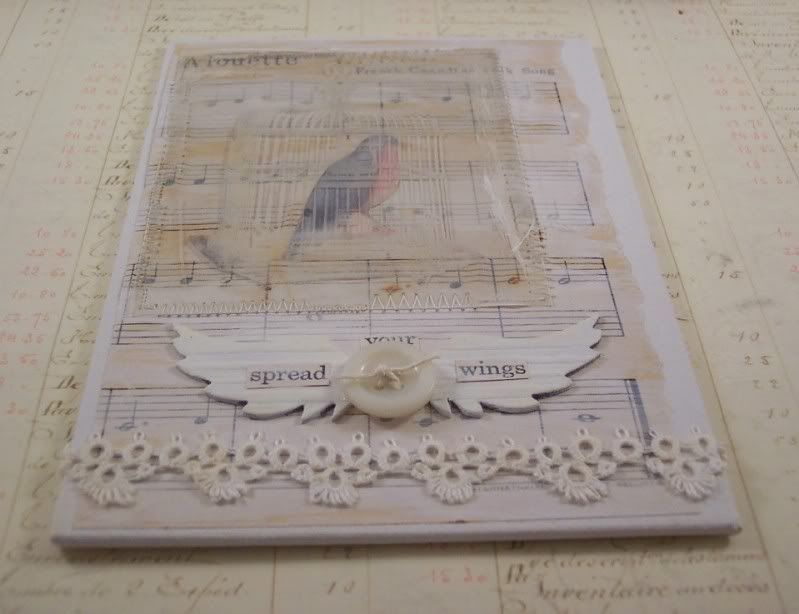
I’ve really been inspired lately by all the collages I’ve seen that are various shades of white, I love the “shabby” look of it. So I thought I’d give it a try. I white washed most of the items with gesso, sometimes adding water sometimes just straight from the bottle. First I white washed some vintage music paper and an image of a blue bird, then stamped the bird cage on transparency using white, I adhered the bird to the paper and then using my sewing machine I stitched the transparency onto the paper using different stitches. I then white washed a pair of Tim Holtz’ grungeboard wings (if you don’t know grungeboard is sort of a flexible type of chipboard, it’s very cool to work with), tied some string through a vintage button, added them to the board along with the words “spread your wings” and then added some vintage white lace across the bottom. It’s a very different look for me but I like it alot:)
I think it’s pretty obvious I love things with wings, birds, bees, insects, fairies, etc. I’m not sure why but there’s just something about wings to me. Here’s three totally different pieces of soldered jewelry I’ve done recently but they all have wings in them:)
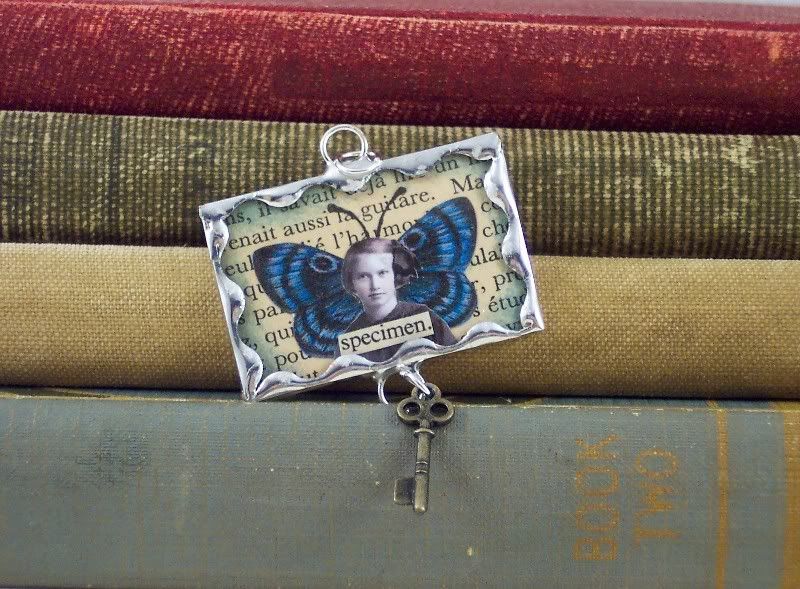
This first one is a fairy. On a piece of vintage French book paper I took an image of a sweet girl and added big wings to her and the word “specimen.” cut from a vintage dictionary then I hand drew her some antenna and soldered around with scalloped tape, I added a key charm to the bottom.
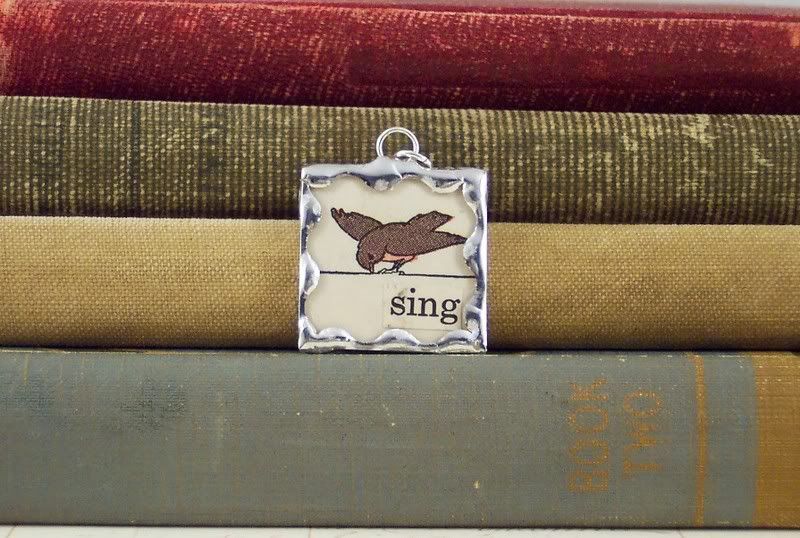
This next one is a tiny bird on a wire cut from a children’s book from 1929, a page number was at the bottom so I covered it with the word “sing” and soldered around with scalloped tape.
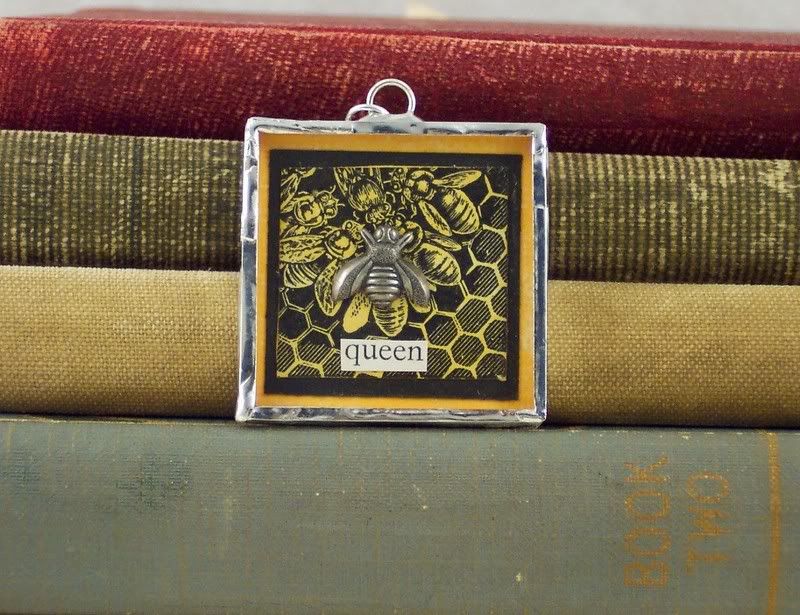
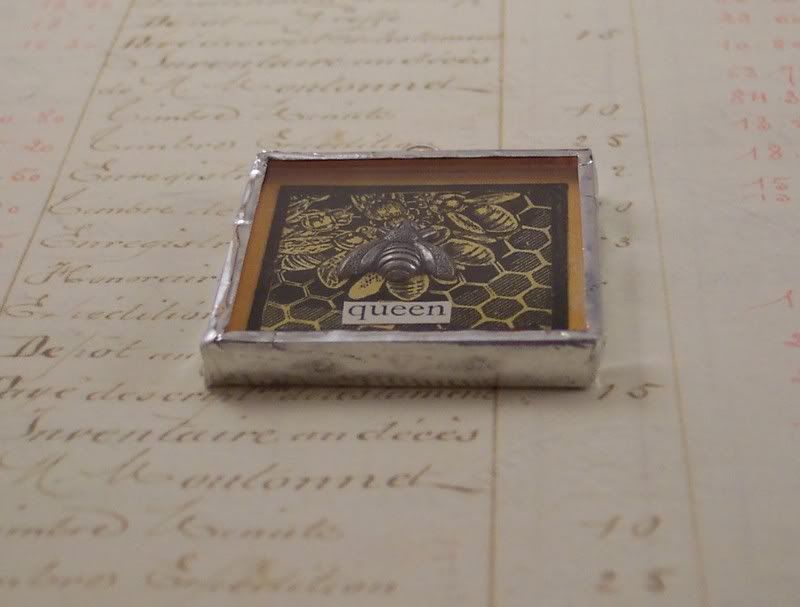
This last one is another shadow box pendant. I used an image of bees and honeycomb from an old field guide and added a pewter bee charm over top and the word “queen” and layered it on yellow and black cardstock. I love the dimension on this one!
I love working on canvas board for my collages as opposed to a stretched canvas over a wooden frame because there is no “sag” in the middle and they are a little less expensive, which is always a good thing:)
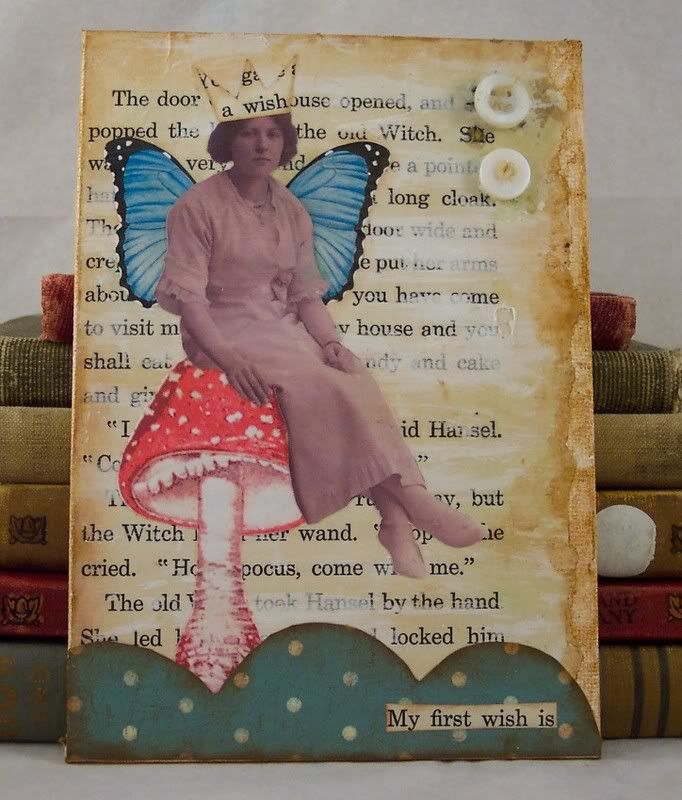
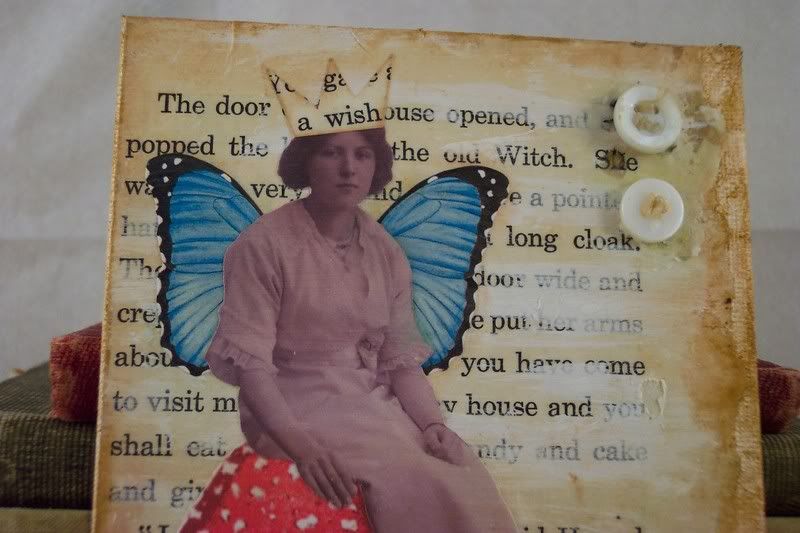
For this collage I started out with a 5″x7″ canvas board and inked the edges in a brown ink. Then I tore a page out of a vintage children’s book (a story about Hansel and Gretel) and inked those edges, then using gesso I white washed the page as well and adhered it to the canvas with gel medium. I cut out an image of a mushroom and adhered it to the canvas and then cut out a scalloped border from polka dotted scrapbooking paper, inked the edges and applied it to the bottom. I cut out an image of a sitting woman, added wings to her and then adhered her on top of the mushroom. I cut out a crown and the words “My first wish is” from the same book, inked the edges and adhered them. I then sealed it all with gel medium and added two vintage buttons, that still have thread in them, to the piece with some melted beeswax. I’m super happy with the results.
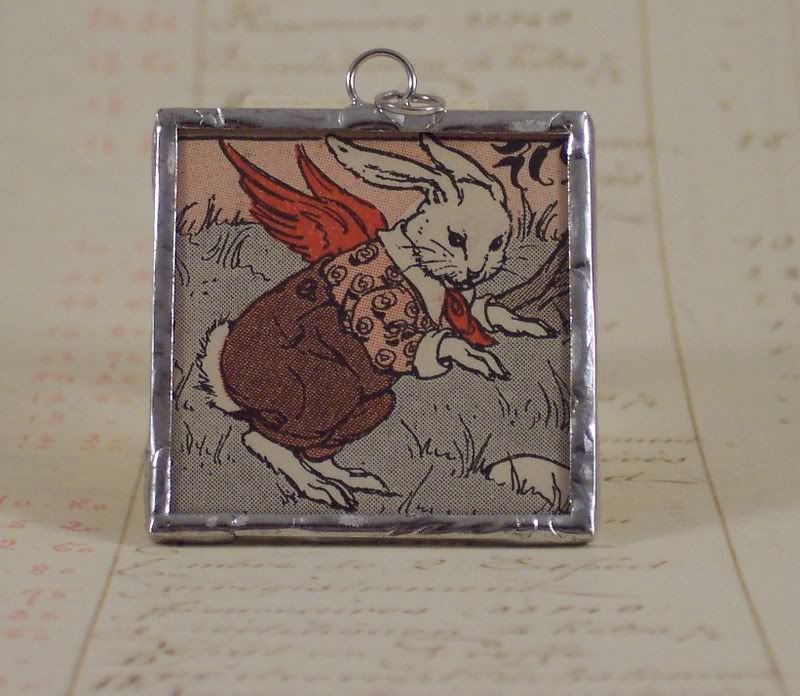
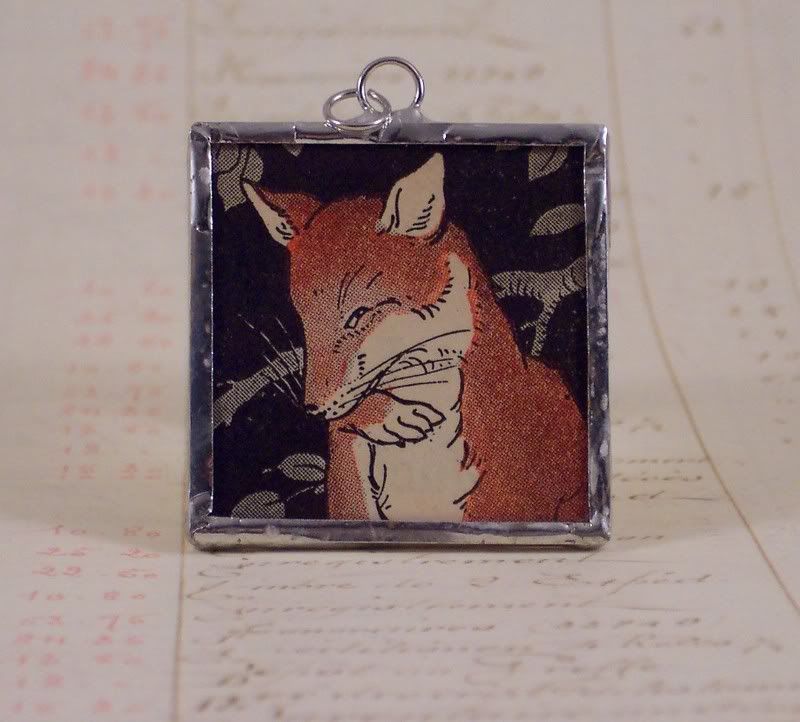
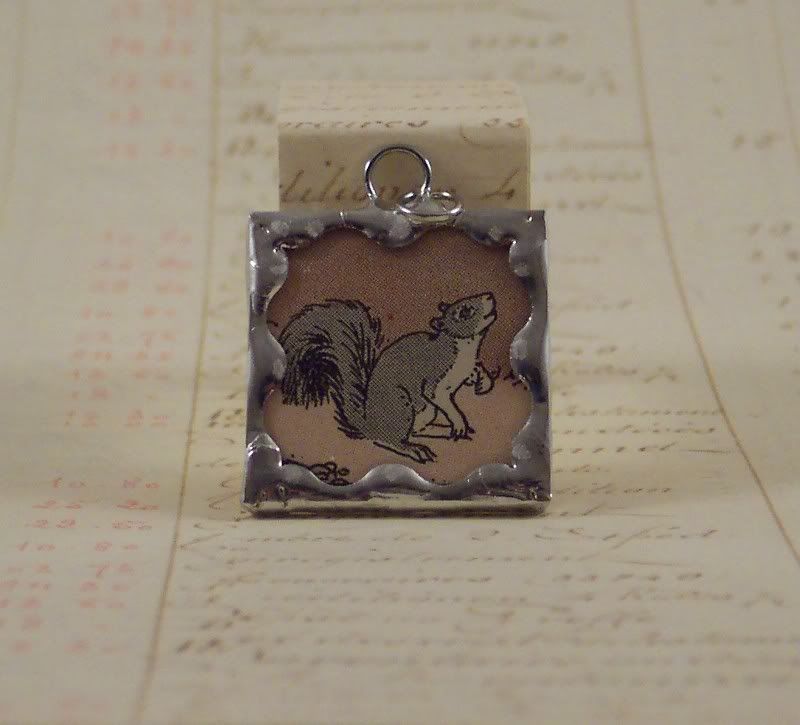
I recently found a wonderful children’s story book from 1929 that has some beautiful illustrations in it and decided to use them for some soldered pendants, on the backs I added words I cut out from the stories.
This first one was about the story of a little bunny who wanted red wings, on the back it says “I wish I had a pair of little red wings”
This next one is a pretty red fox who was down and thinking, the back says “the fox thought and thought”
This one is a cute little grey squirrel and the back says “Mr. Bushy Tail”
These unique pendants are currently on sale in my Etsy shop:
http://www.PisforPaper.etsy.com