Hop on over to my Youtube channel and I’ll show you how to use small floral stamps to make a pretty Easter egg shaped card using a masking technique. Click here to watch it.
-Heather

Hop on over to my Youtube channel and I’ll show you how to use small floral stamps to make a pretty Easter egg shaped card using a masking technique. Click here to watch it.
-Heather
Over on Craft Gossip I’ve shared a product review for some new items from Imagine Crafts and I wanted to share that project along with some instructions and step by step photos of how I made my project.

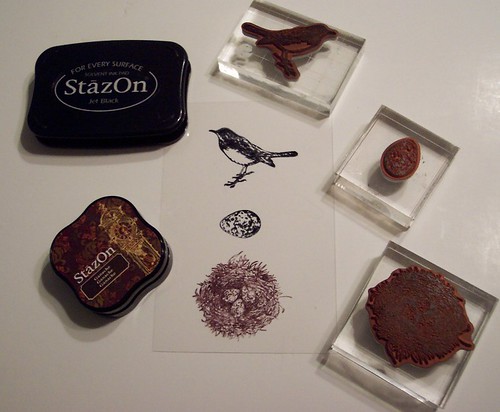
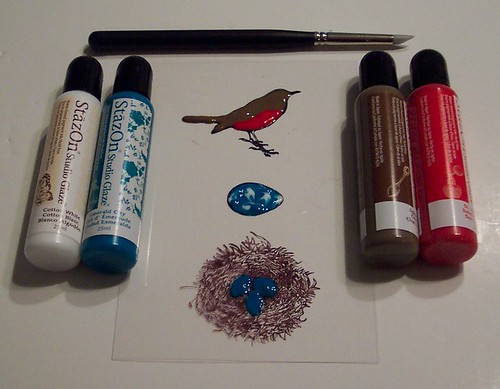
I started out using Black and Brown Staz On ink pads to stamp my bird, egg and nest onto clear acetate. I turned the acetate over and used the new Staz On Studio Glazes (in Emerald City, St. Valentine and Cotton White) to color my images. After letting the glaze dry it becomes shiny and a little transparent and on a clear service it gives an amazing stained glass effect! If you color outside of the edges you can push the glaze back using the sponge tip tools , these tools also work well for swirling colors, like I did with the blue and white on the egg. Next I attached my stamped acetate to a piece of sticky back canvas paper and cardstock using brads.


Next onto a canvas board I swiped streaks using the Blue Hawaii Staz On Midi ink pad and Broze Delicata Ink and then using one of the Palette knife tools I spread streaks of Bronze Metallic Creative Medium. After that dried I also sprayed some white Irresisitable ink spray.
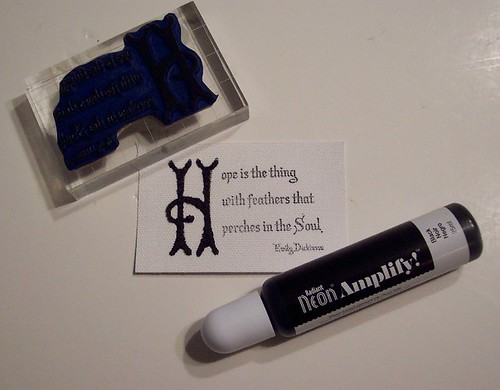
Lastly I used Black Staz On to stamp my quote for Emily Dickinson onto canvas paper and used the Black Radiant Neon Amplify to go over the large letter H. Amplify comes in bright neon colors as well as black and white and when heated with a heat tool it puffs up for texture and dimension. Then I adhered my words to my canvas and was done. I love how it turned out!
-Heather
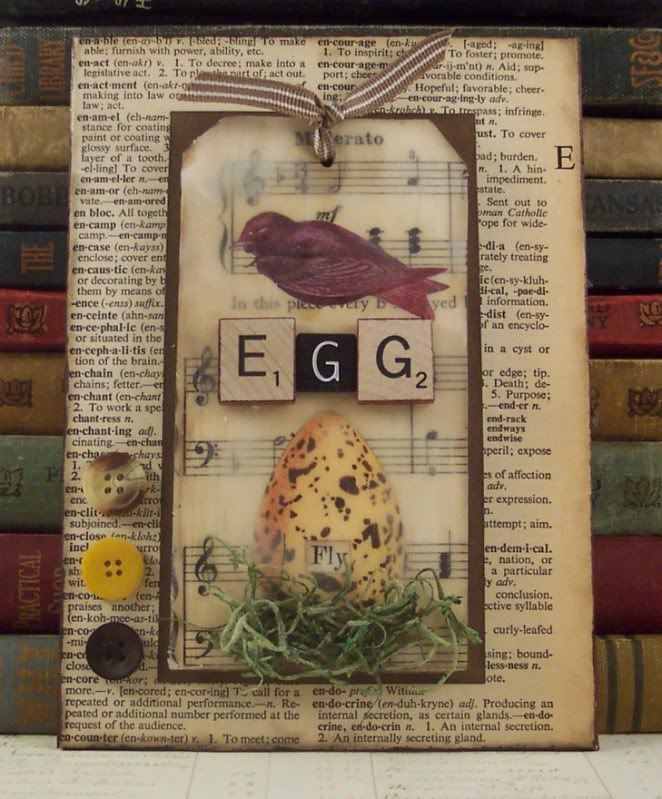
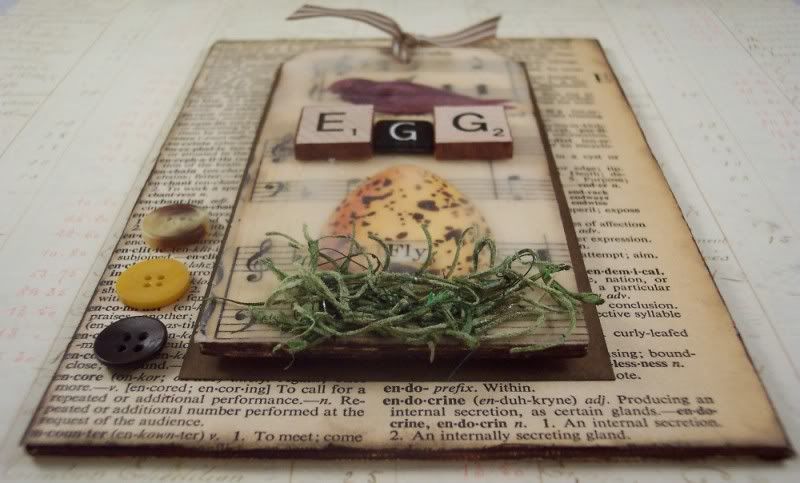
Melting wax that is. I decided I hadn’t played with bees wax for awhile so I got my little crock pot out and played around with it the other day. I made some more captured fairy in a jar art cards, like I did in the past, dipping the collaged jars into the bees wax, they always turn out cute. I also did a bird collage I’m really happy with. I started with a wooden tag and collaged vintage music sheet and images of a bird and egg and the word “fly” cut from a vintage book. Then I took a brush and covered the tag with the melted wax. One of the cool things about wax is it can be remelted. So in a couple spots were it was too thick and cloudy I used my heat tool and melted it a bit to thin it out. You can also use a mini iron to melt the wax as well. I then added some game pieces that spell “egg” and faux grass for a nest. I covered a 5 x 7 canvas board in vintage dictionary paper, mounted the tag in the middle on cardstock and then added a few vintage buttons.
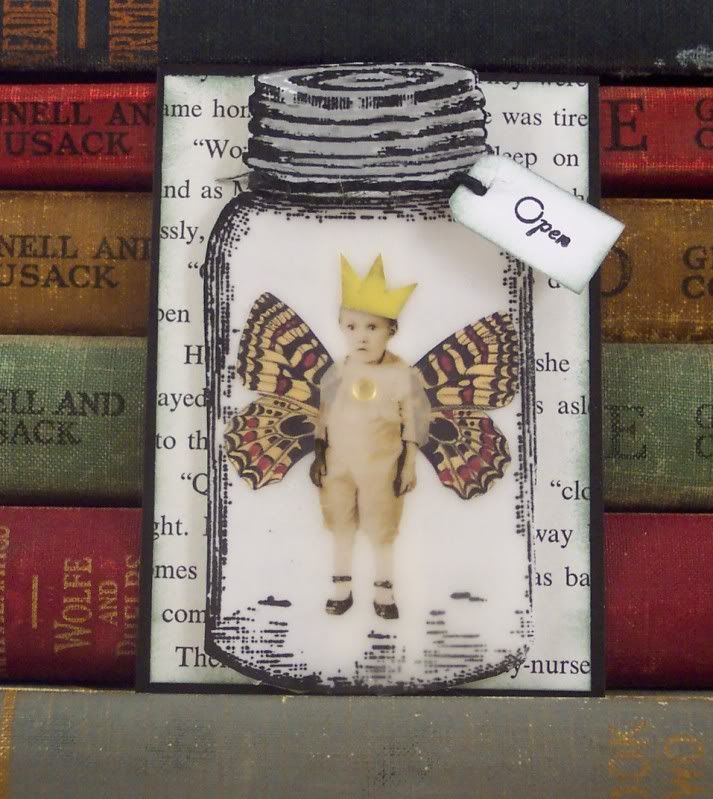
Here’s a couple of my fairy art cards:
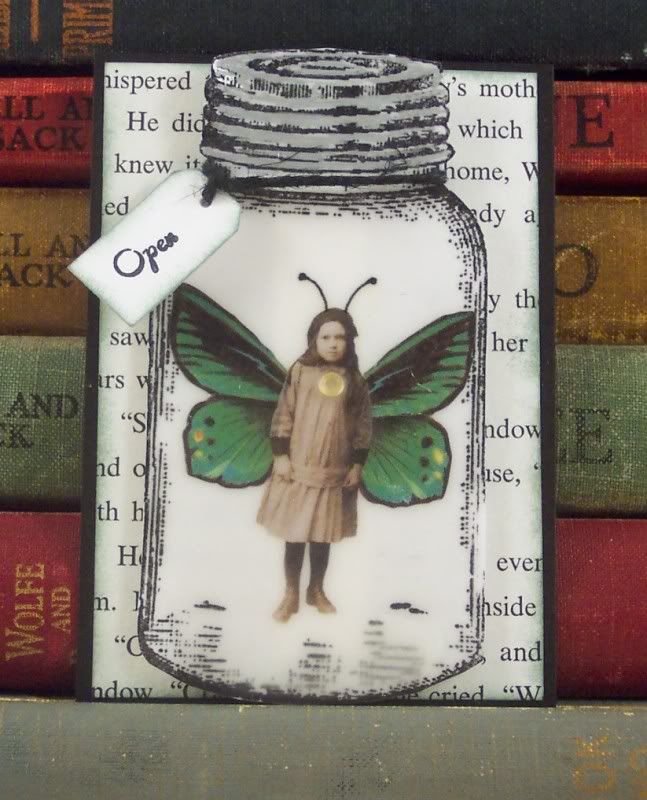
doesn’t he look shocked to be captured?:
and this is my bird and egg collage:
Happy St. Patrick’s Day everyone! We always celebrate in my family because we’ve got a lot of Irish ancestors and it’s also my brother’s birthday. When we were little we always left a piece of cake out for the leprechauns 🙂
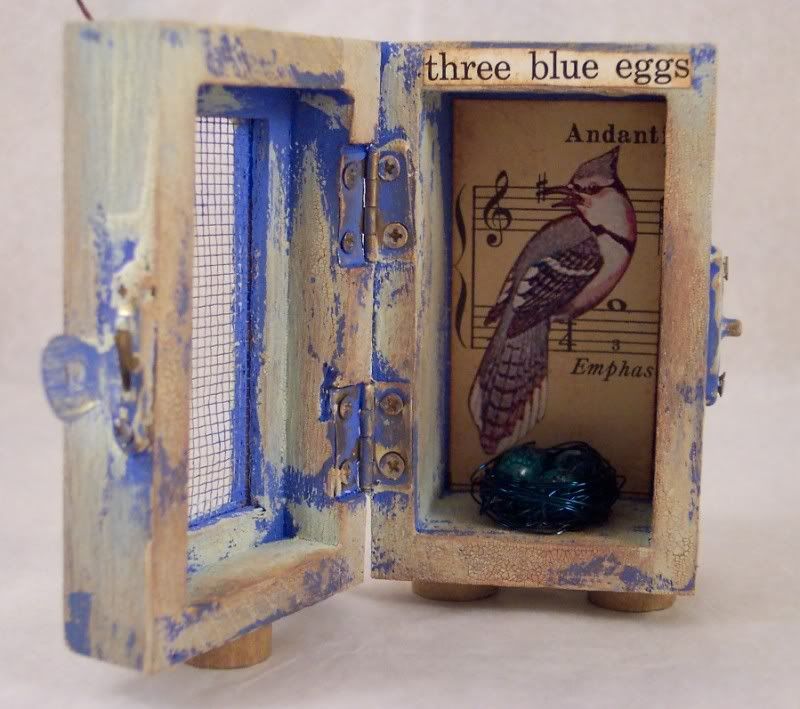
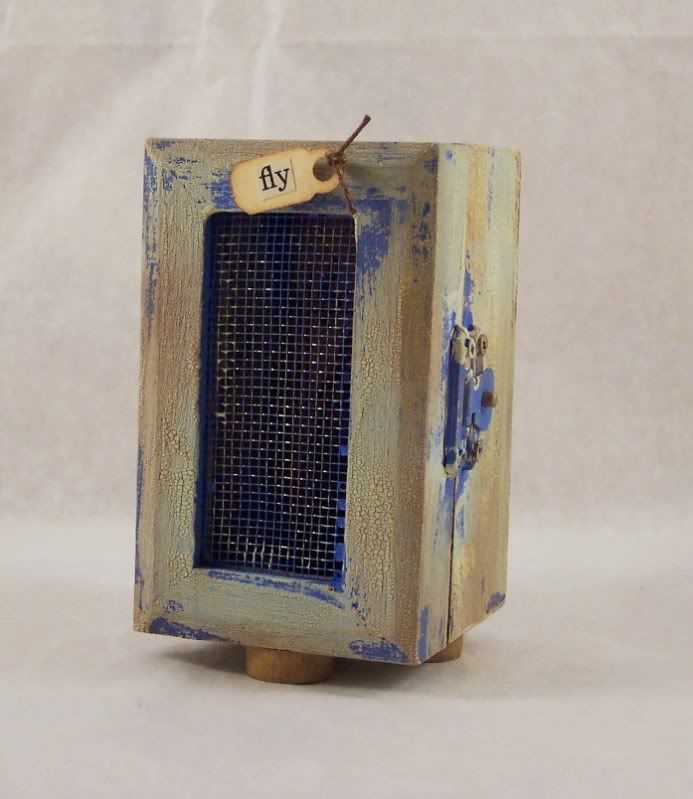
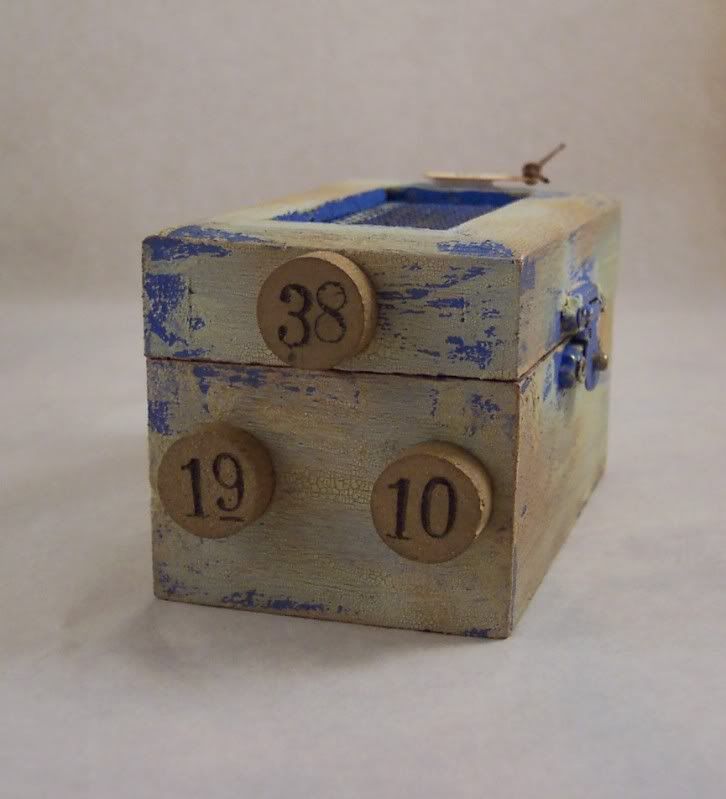
Sadly I don’t have anything green to share but instead it’s blue. It’s a bird shrine box. I took a small wooden box with a hinged and latched lid that also has a wire screen in the front and painted it blue then used Tim Holtz’ crackle paint and distress inks to age the box. I added a tiny tag to the front door with the word “fly” cut from a vintage book. Inside I made a tiny collage from an image of a blue jay on some vintage music paper and over the door added the words “three blue eggs” also from a vintage book. My favorite part is the tiny wire nest I made and glued inside. I took a very long piece of thin blue wire and ran three blue speckled beads onto the middle and just started wrapping the wire around and around and then pushing it down around the sides of the beads to form a nest shape. It’s the first one I’ve made and I think I’ll probably be going to get lots of wire to make more:) Then finally I glued three vintage game piece to the bottom for feet.